
Buckle up for the FTC disclosure ride here. The following article was last updated on Oct 27, 2025 ...
How To Wire Your Helmet's Intercom For Speakers AND Earbud Headphones
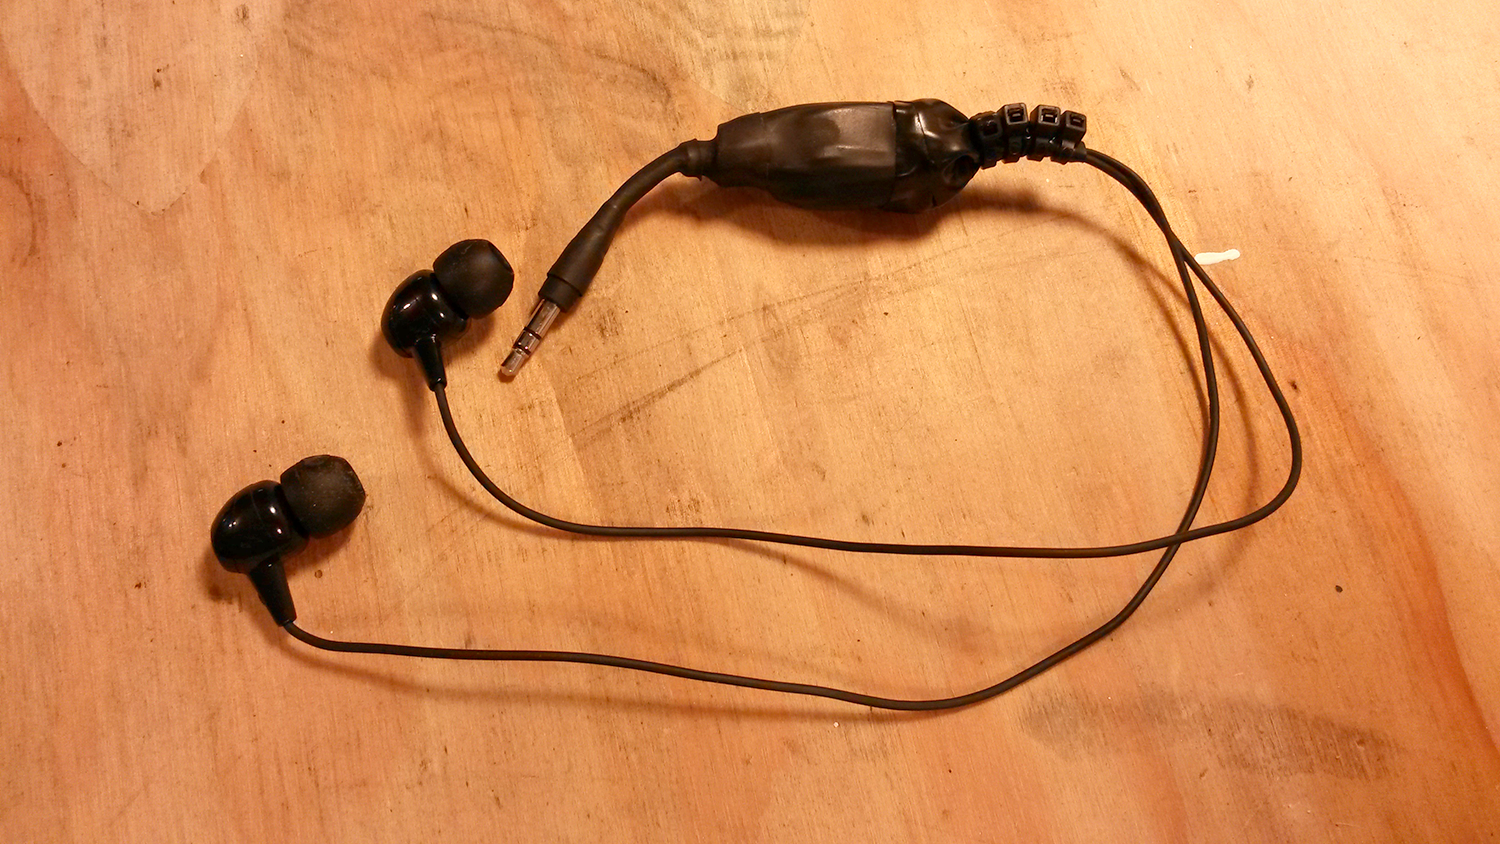
One feature that motorcycle helmet intercom manufacturers seem resistant to implement is 3.5mm headphone jacks. Even the most expensive intercom models, some not worth their weight in plastic, come with over-promoted, underpowered speakers that collapse all potential in what might otherwise be a worthwhile purchase. Some of us, myself included, end up shelling out serious cash for a not so serious luxury as a result.
“Wiring speakers and headphones with Sena's earbud jack lets riders run both at once. Buds cut wind noise, speakers stay as backup.”
And why wouldn't we? Motorcycling is an expensive pastime (and for some, a career). With so much money flying around in its marketplace, especially in sport touring, you'd think resellers would take the time to focus on what consumers actually prefer. The ones who do more than make up for it using an exaggerated price tag. I don't intend to downplay the cost of research and development; I'm sounding off to the powers that be: plan more carefully!
All complaining aside, I'm enormously happy with my Sena SMH10. Because it does offer an earbud jack, I'm able to run both headphones and speakers simultaneously. This is good for many reasons but two stand out. First, a decent pair of earbuds will isolate audio while suppressing wind noise. Second, should we find ourselves without earbuds, the speakers function as a static backup.
If your goal is wiring speakers and headphones into one helmet, this setup nails it.

Notice how I'm not linking Sena's purchase page (yet). There's a reason for that. To install both a 3.5mm headphone jack and static speakers, our Sena and 3rd party shopping list is a bit particular. Sena's high end and priced to suit, so save yourself time by knowing what's required.
These instructions assume that your installation is for a full-face or modular helmet, such as Shoei's Neotec series. Should that not be the case, take care to read through this entire page before selecting your Sena products. In short, "Measure twice and cut once."
What's Required:
- Sena SMH10 Module
- Custom Modified Sena Helmet Clamp Kit
- StarTech 3.5mm Stereo Splitter Cable
- C2G 1.5' M-to-F Stereo Extension Cable
- Rugged Radios HK-SPK Stereo Helmet Speakers
Instructions for Wiring Speakers and Headphones:
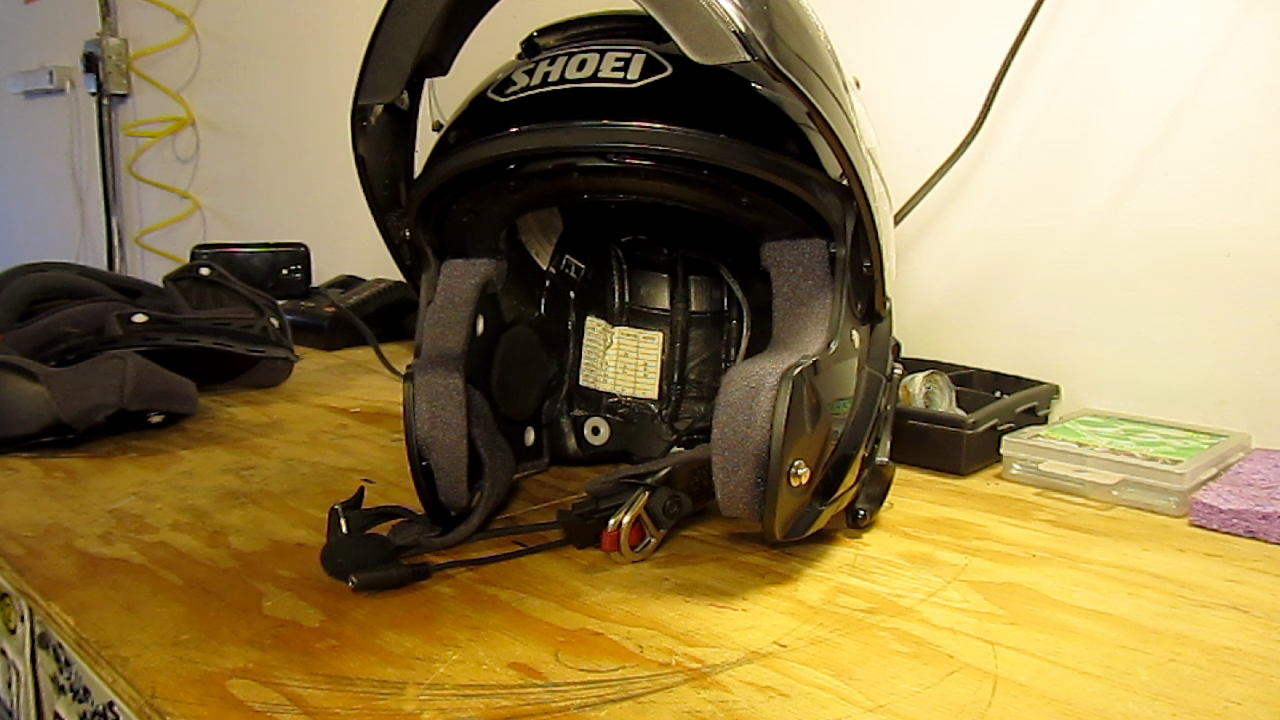
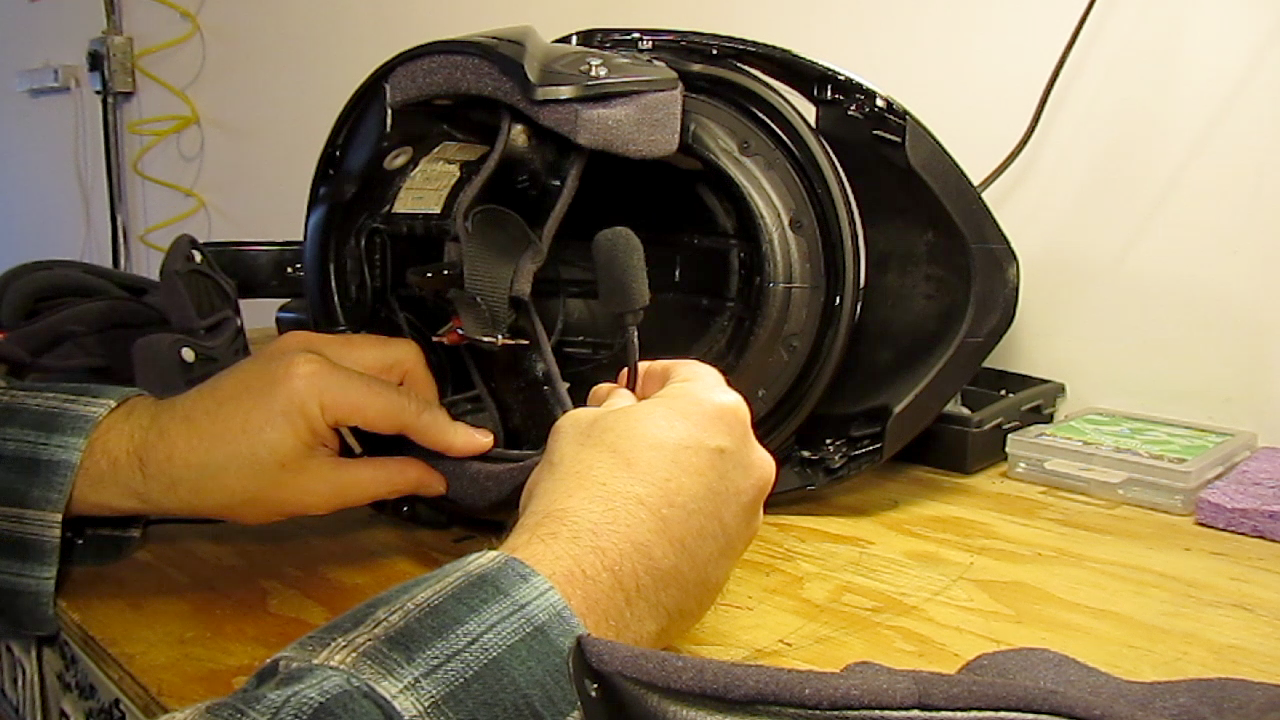
(1) Remove all of your helmet's washable padding per the manufacturer's instructions.
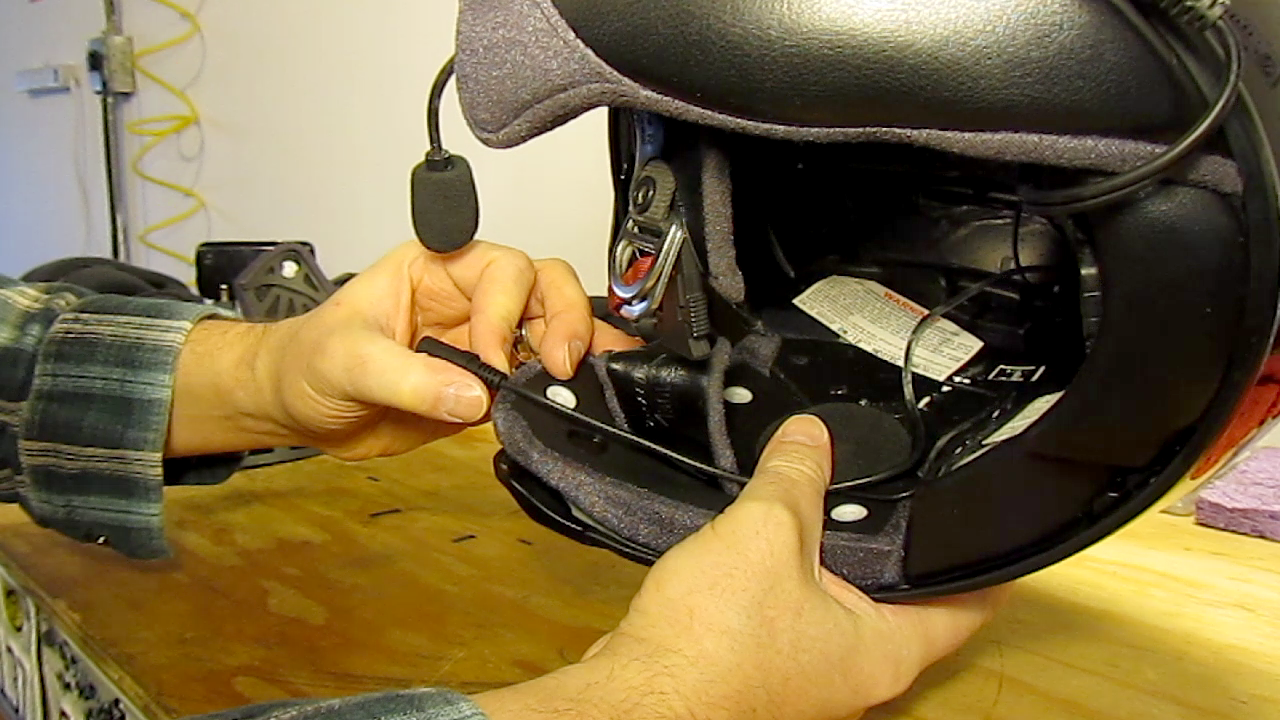
(2a) Place a 3/4" length of heat shrink tubing over the 3.5 Y-cable's single/male end.
(2b) Plug the 3.5mm Y-splitter single/male end into your Sena clamp kit's audio jack.
(2c) Guide the heat shrink tubing over the Y-cable and jack connection and apply heat, sealing it.

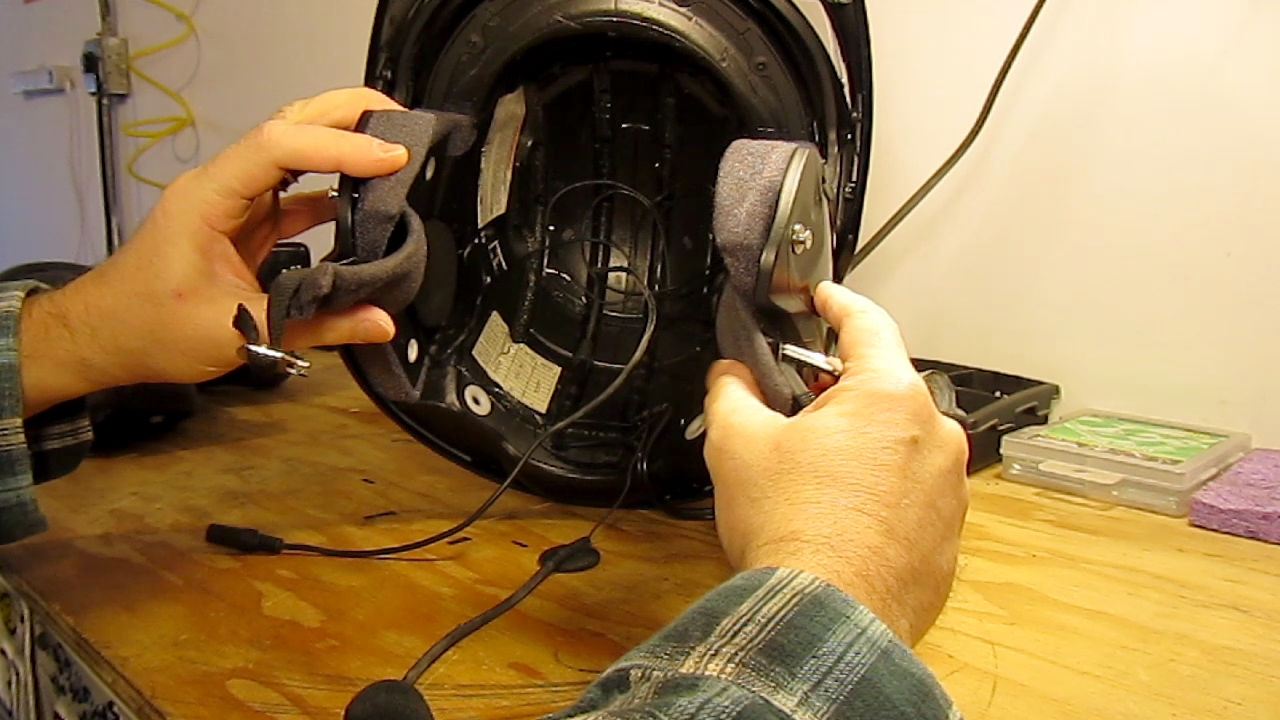
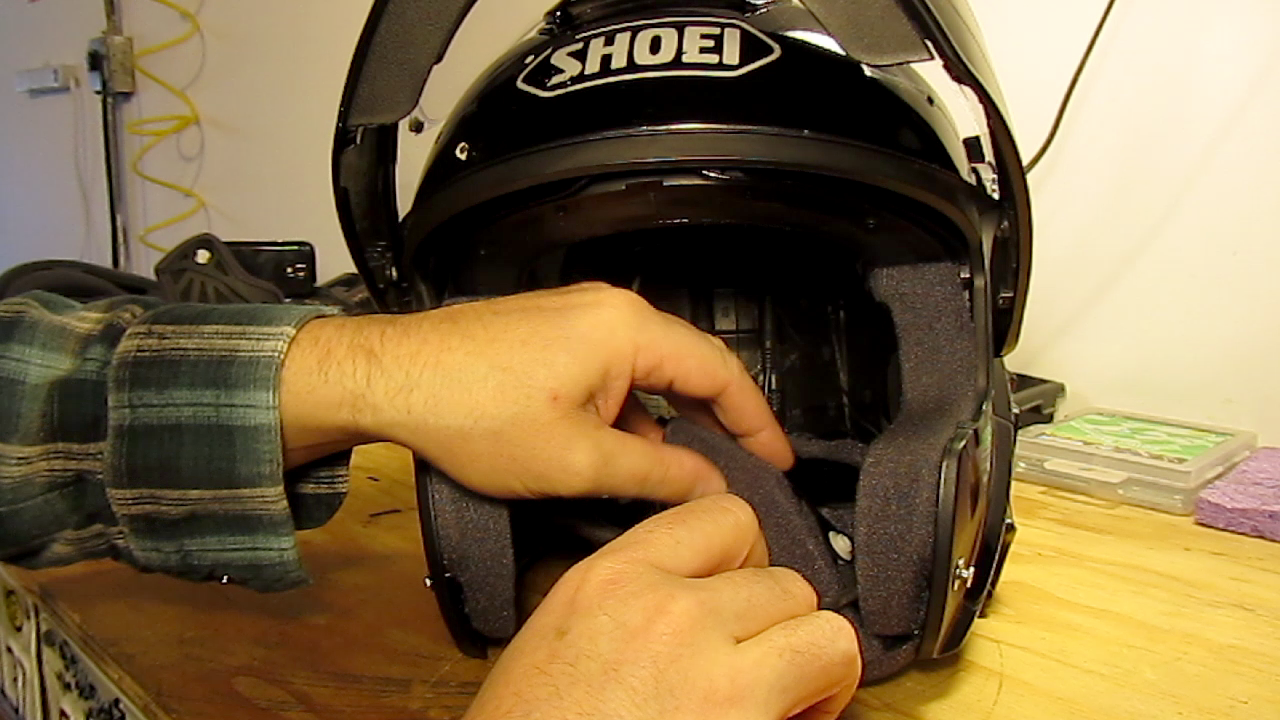
(3a) Using Sena's recommended path for their speaker lines, route the 3.5mm Y-splitter.
(3b) Compress the separate female Y-splitter jacks into your helmet's safety material (divots).


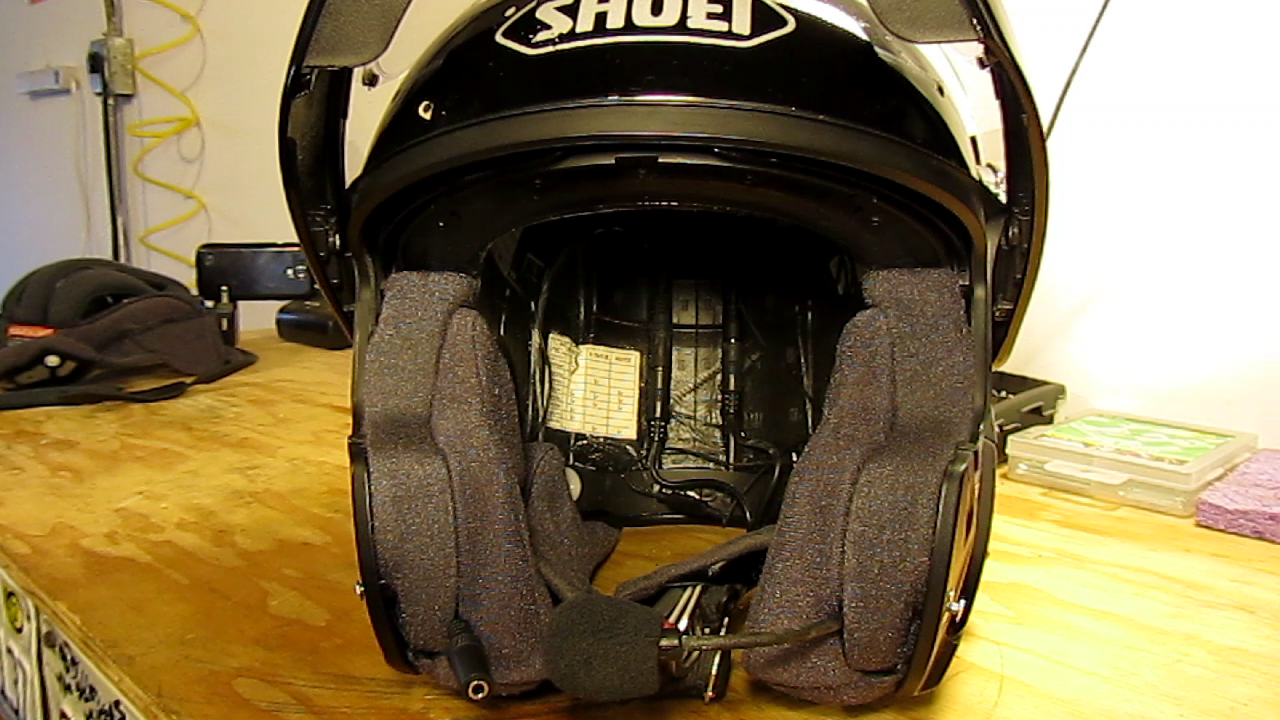
(4a) With their wire ports aimed diagonally downward toward the back, position and compress the speakers into their respective ear wells.
(4b) Guide the speaker wires with as much logic as possible to the 3.5mm Y-splitter jack that's positioned (helmet on) to the left.
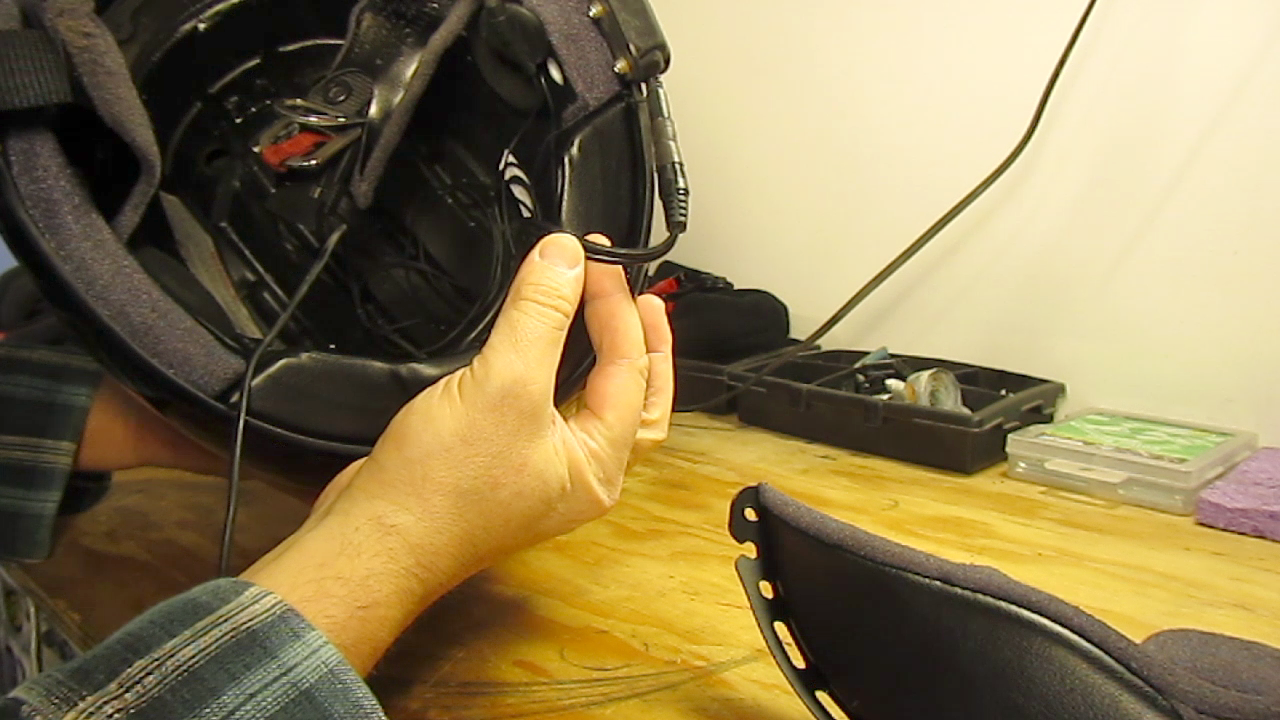
(5) Rest the helmet on its side and plug the 1.5' 3.5mm stereo extension cable into the opposite 3.5mm Y-splitter jack to continue wiring speakers and headphones correctly.
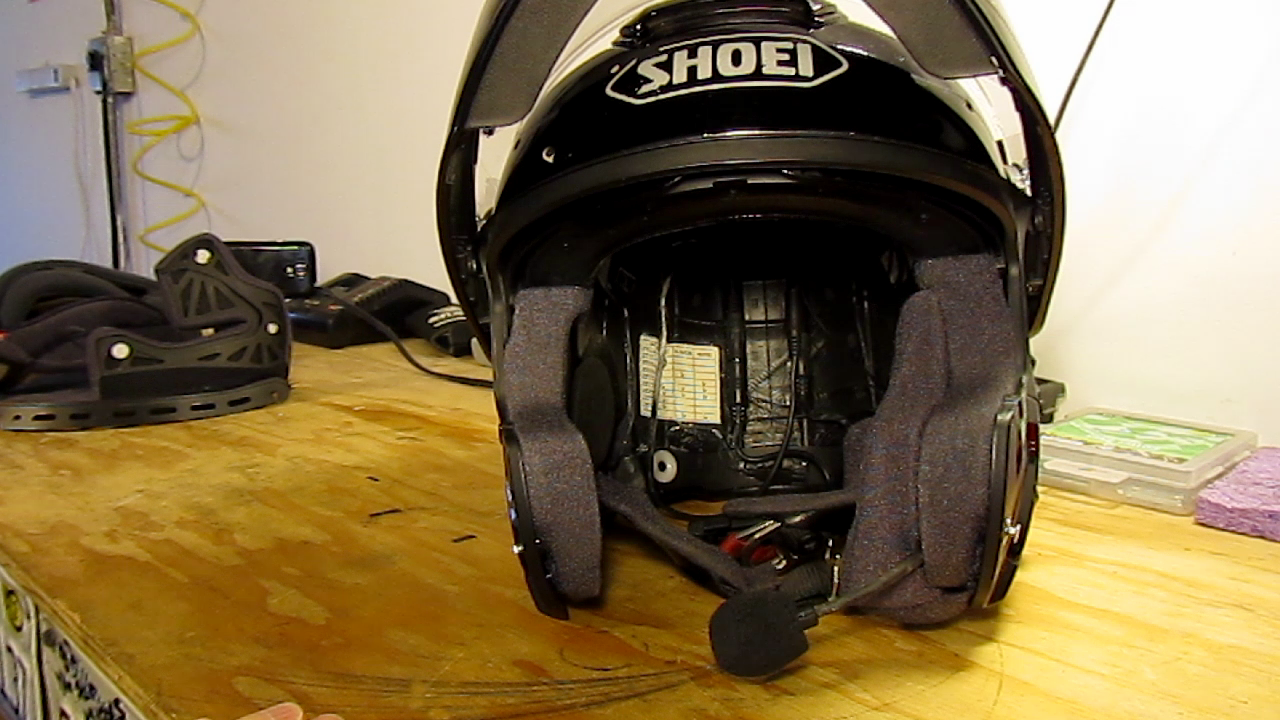
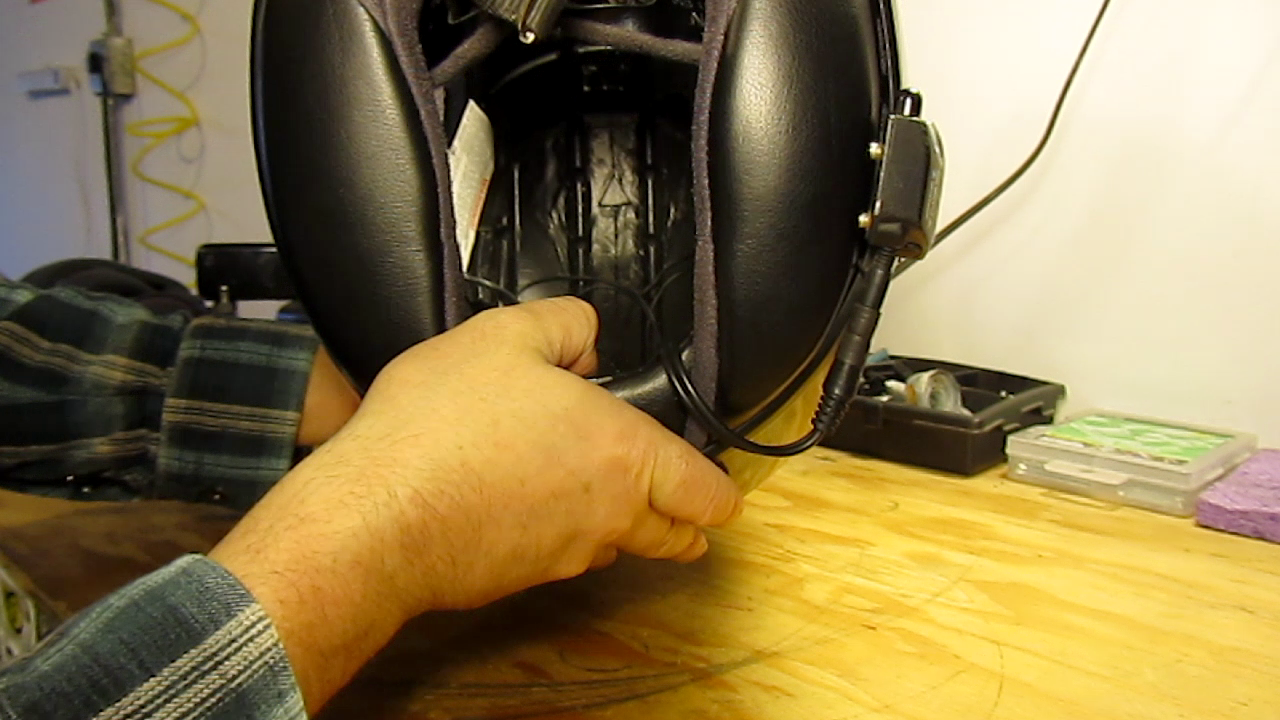
(6a) Route the microphone along the chin line below the strap.
(6b) Clear away any wires other than the microphone or input lines and replace the left cheek pad.
(7a) Using a path from the rear of the helmet along the right chin line below the speaker, route your 1.5' 3.5mm stereo extension cable.
(7b) Clear away any wires other than the 3.5mm input line and replace the right cheek pad.

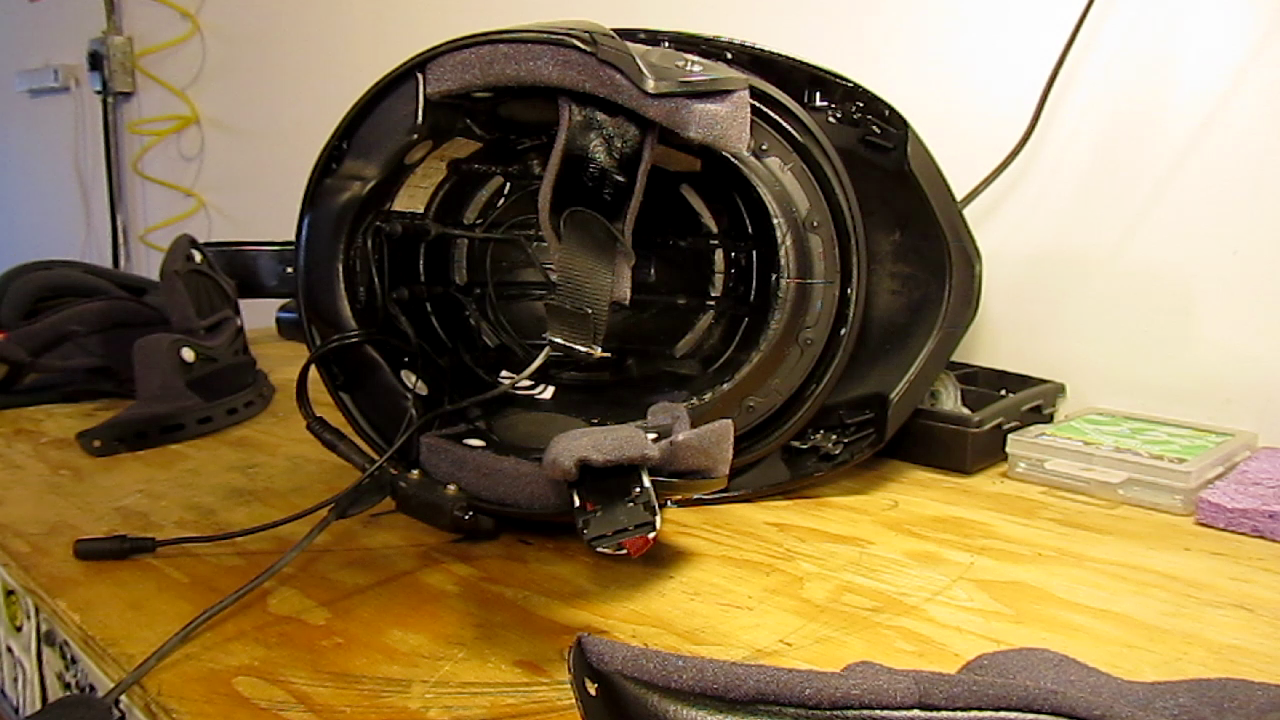
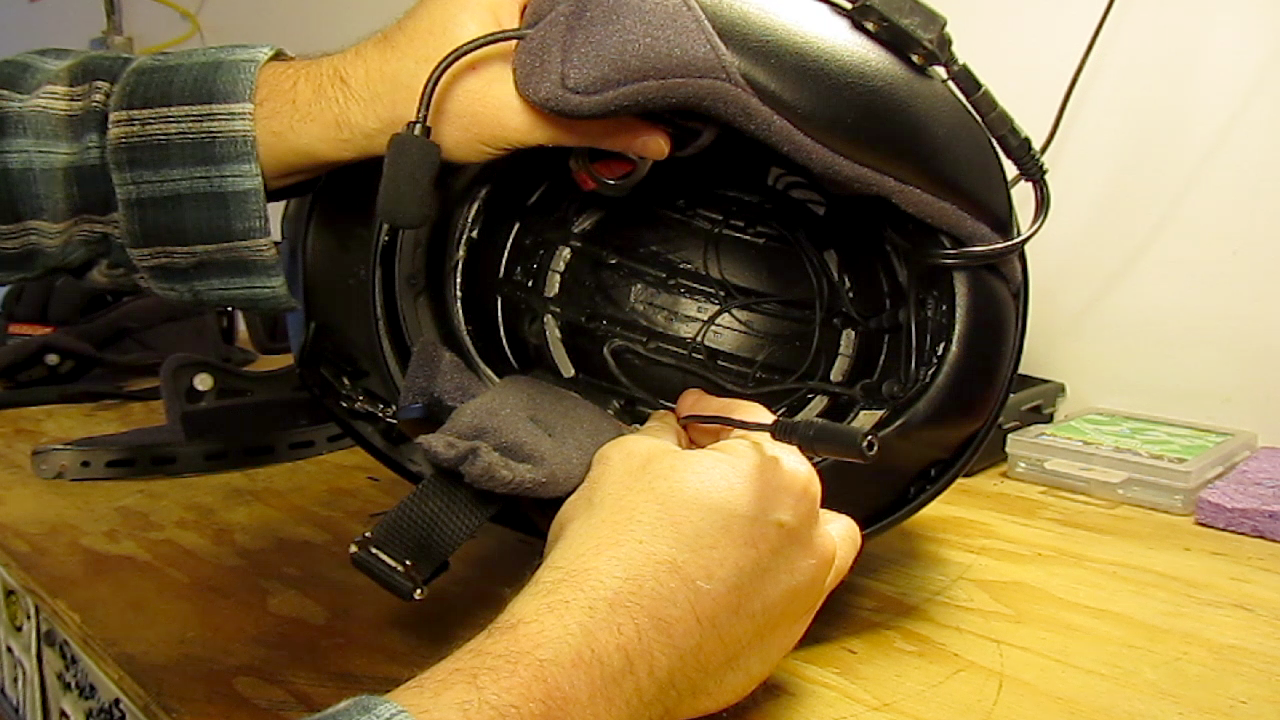
Because we replaced both cheek pads without compressing a wire mess behind them, we're left with some spaghetti where the top and back of our head goes. The best you can do is organize it so that it takes up as little space as possible in points where there's little to no pressure on your head. This is most often near the lower crown or base when wiring speakers and headphones inside tight helmet cavities.
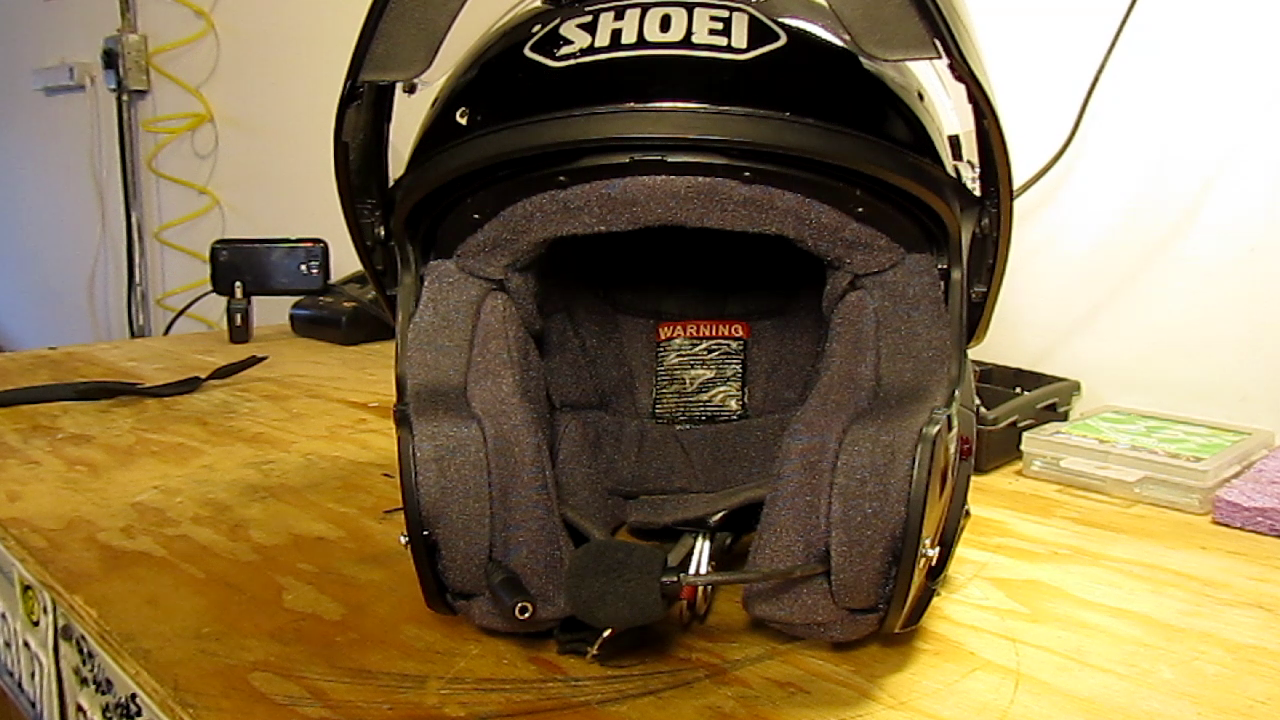
Reinstall the top/rear padding before feeling things out. Be sure that no wires are protruding, jabbing or uncomfortable while the helmet is on. If that's the case, you're all set!
What About The Cable To My Earbuds?
Of course, you don't want a tangled mess of wires dangling below your chin strap from your ears. That's why we went to all of this trouble in the first place! The solution is simple enough. Get a gauge of heat shrink tubing that's wide enough to encompass your earbud cable's excess. Wrap and compress the cable into a length of said tubing and shrink accordingly ...
This remainder of the line tucks easily above the helmet's chin curtain. Another option is to purchase short buds; as the name suggests, manufacturers make them with shorter cables. I've used them in the past to some success, though I currently prefer in-ear monitors.
Wiring Speakers and Headphones Summary
Having completed the entire process above, here are some truths to look forward to. Your earbud headphones use far less power than the speakers, so by wearing them you save battery life. At the same time, you'll always have speakers installed as a backup. They don't sound as good but there's no complication to their use. The combination of both creates a rich sound as well.

What Custom Wiring Schemes Have You Devised?
Audio, lighting, horns ... there are too many prospective motorcycle modifications to count. What are some of your favorites? Your input is invited. Leave a comment and/or write an article!
Share Link ...

About Robin Dean
Motorcycle advocate, enthusiast and traveler. Founder, The Riding Obsession (2014). MSF RiderCoach credentials: "loosely regarded adult supervisor, probably good enough for rock 'n' roll" ~ Tidal Playlist | Rabid Neon


Comments
This is absolutely brilliant.
I spent the better part of my day trying to adapt a TRRS socket to my bluetooth unit. I managed to make the earbuds work but as soon as I initiated a phone call there was crackling noise and the microphone wouldn't work.
I basically destroyed the headset and then I found your article. I ordered a couple more headsets and now I am getting ready to try wiring only the earbuds while keeping the original microphone.
My unit differs a bit from yours as the microphone is not part of the main bluetooth body but actually is attached to the left speaker. My theory is that by using the original microphone and only connecting the stereo earbuds it should not cause interference and work as intended and with a splitter I can actually keep the original speakers in as a backup.
This is the unit I have ...
Wish me luck.
Ok. Instead of going to bed I went and tried my theory with whatever was left of the headset.
It does work.
Now I only need to wait to get the replacement headsets and the higher mAh batteries and my missus's and my helmet will be set.
Thanks for the article. It helped greatly. I was ready to throw the towel.
While I'm not familiar with that particular helmet com, I do have some experience with others. There's plenty of merit to your theory. Good luck!
You're welcome, Will! I'm glad things are working out.
Thoughts gone wild? Write an article!