Savor our FTC disclosure's epic tale here. The following article was last updated on Oct 19, 2025 ...
Spoke Wheel Lacing Instructions (1 of 2): Pattern Symmetry
During my initial attempt at lacing spokes, I discovered and compiled a much easier order of operation. When acting on these instructions, there are two important things to consider. For starters, different spokes have different bends, which affects spoke pattern symmetry.
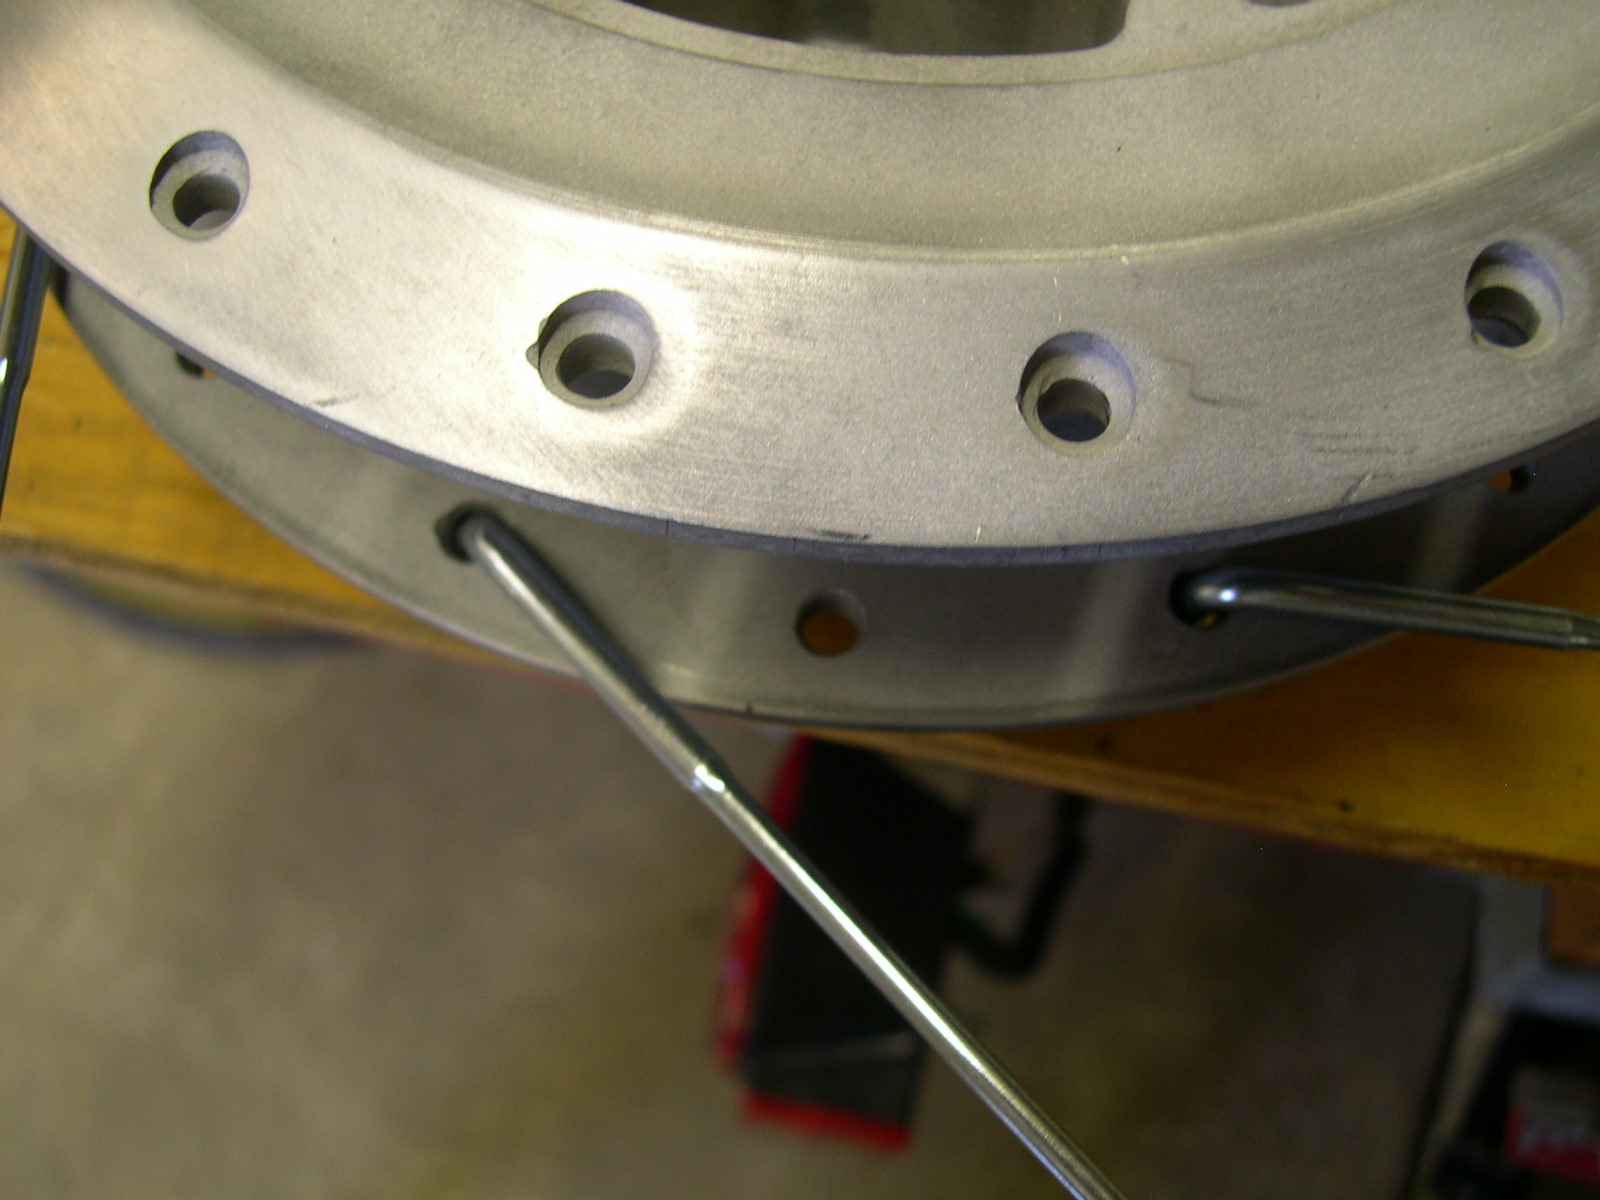
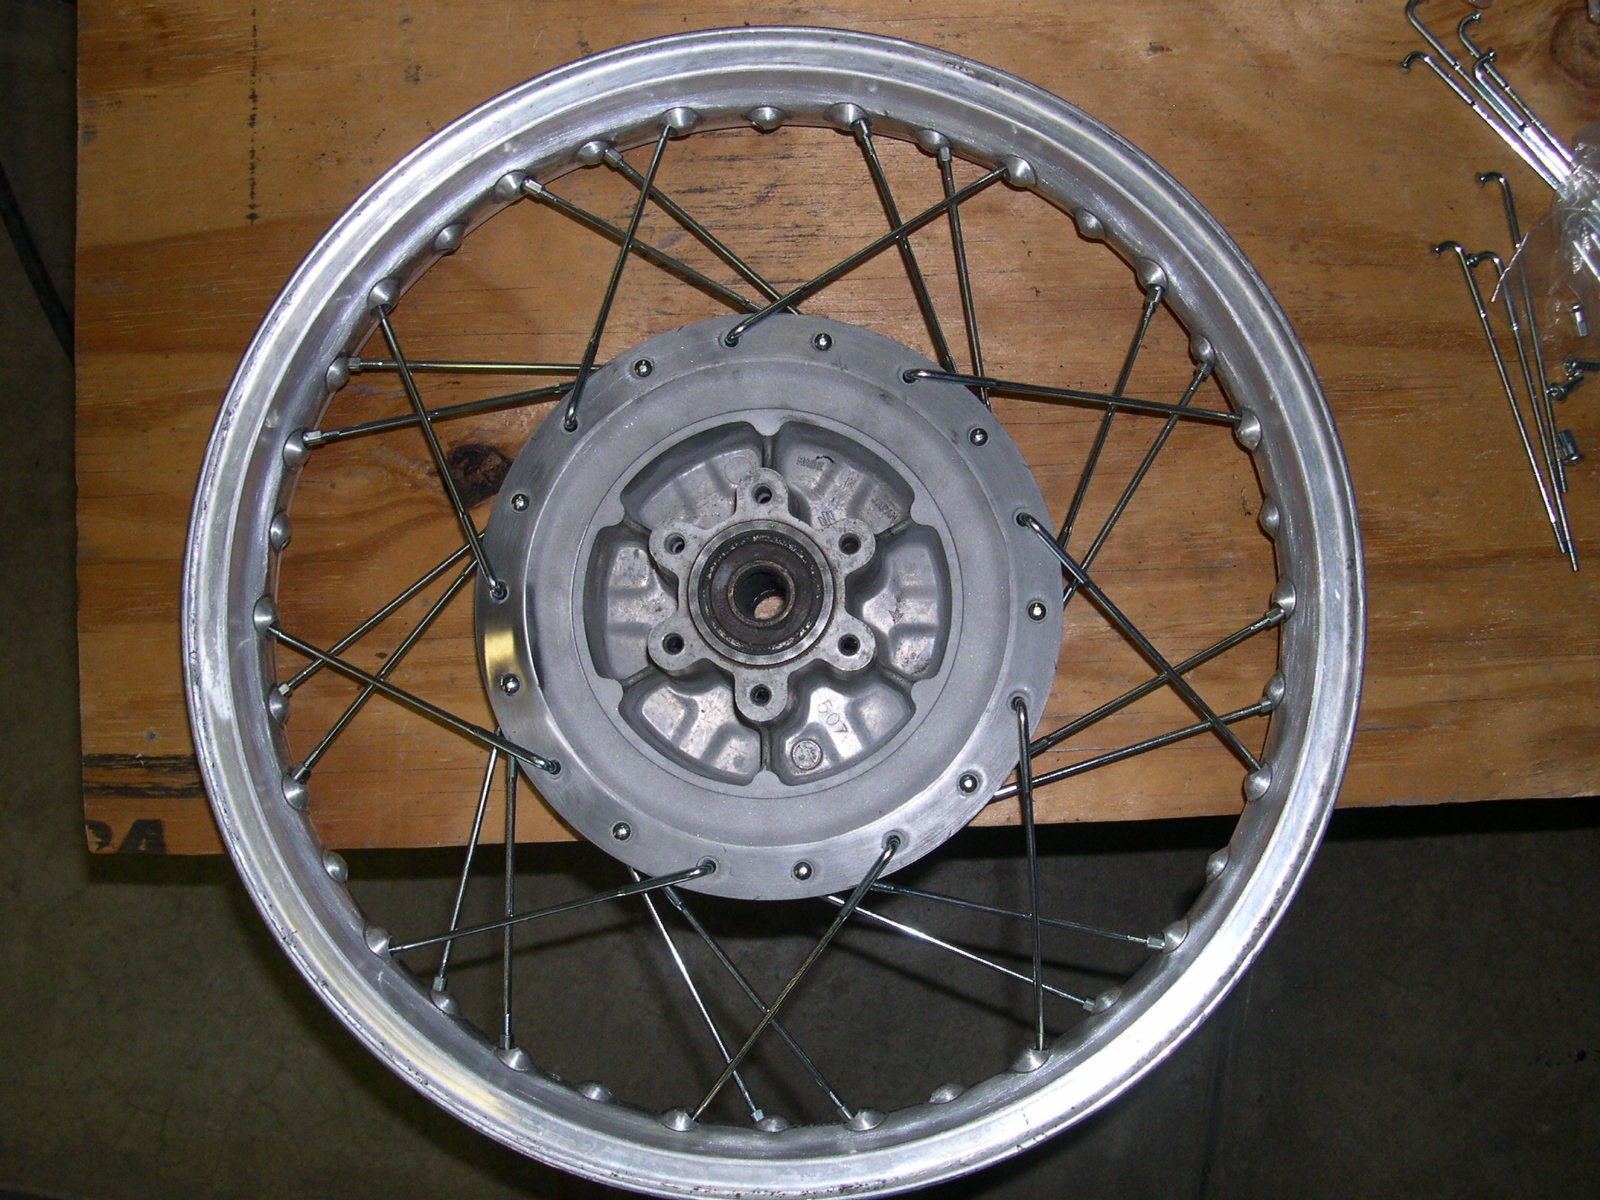
Insert spokes with a tighter bend into every other hole in the hub from the inside out; you will see the bend from the outside. Insert spokes with a lesser bend into every other hole from the outside in; you will see the spoke button from the outside. Tighter-bend spokes will work when inserted either way but lesser-bend spokes will only work when inserted outside in, so be careful to use the correct spokes every time or you'll have to disassemble the wheel all over again!
Second, note that the spoke nipple holes on the rim sit offset left and right. As would make sense, the left nipples are for the spokes on the left side of the rim and vice versa.
Motorcycle Wheel Lacing Instructions For Spoke Pattern Symmetry
- Separate the spokes into two groups, one for the tighter bend and another for the lesser bend. Put the tighter-bend spokes aside for now.
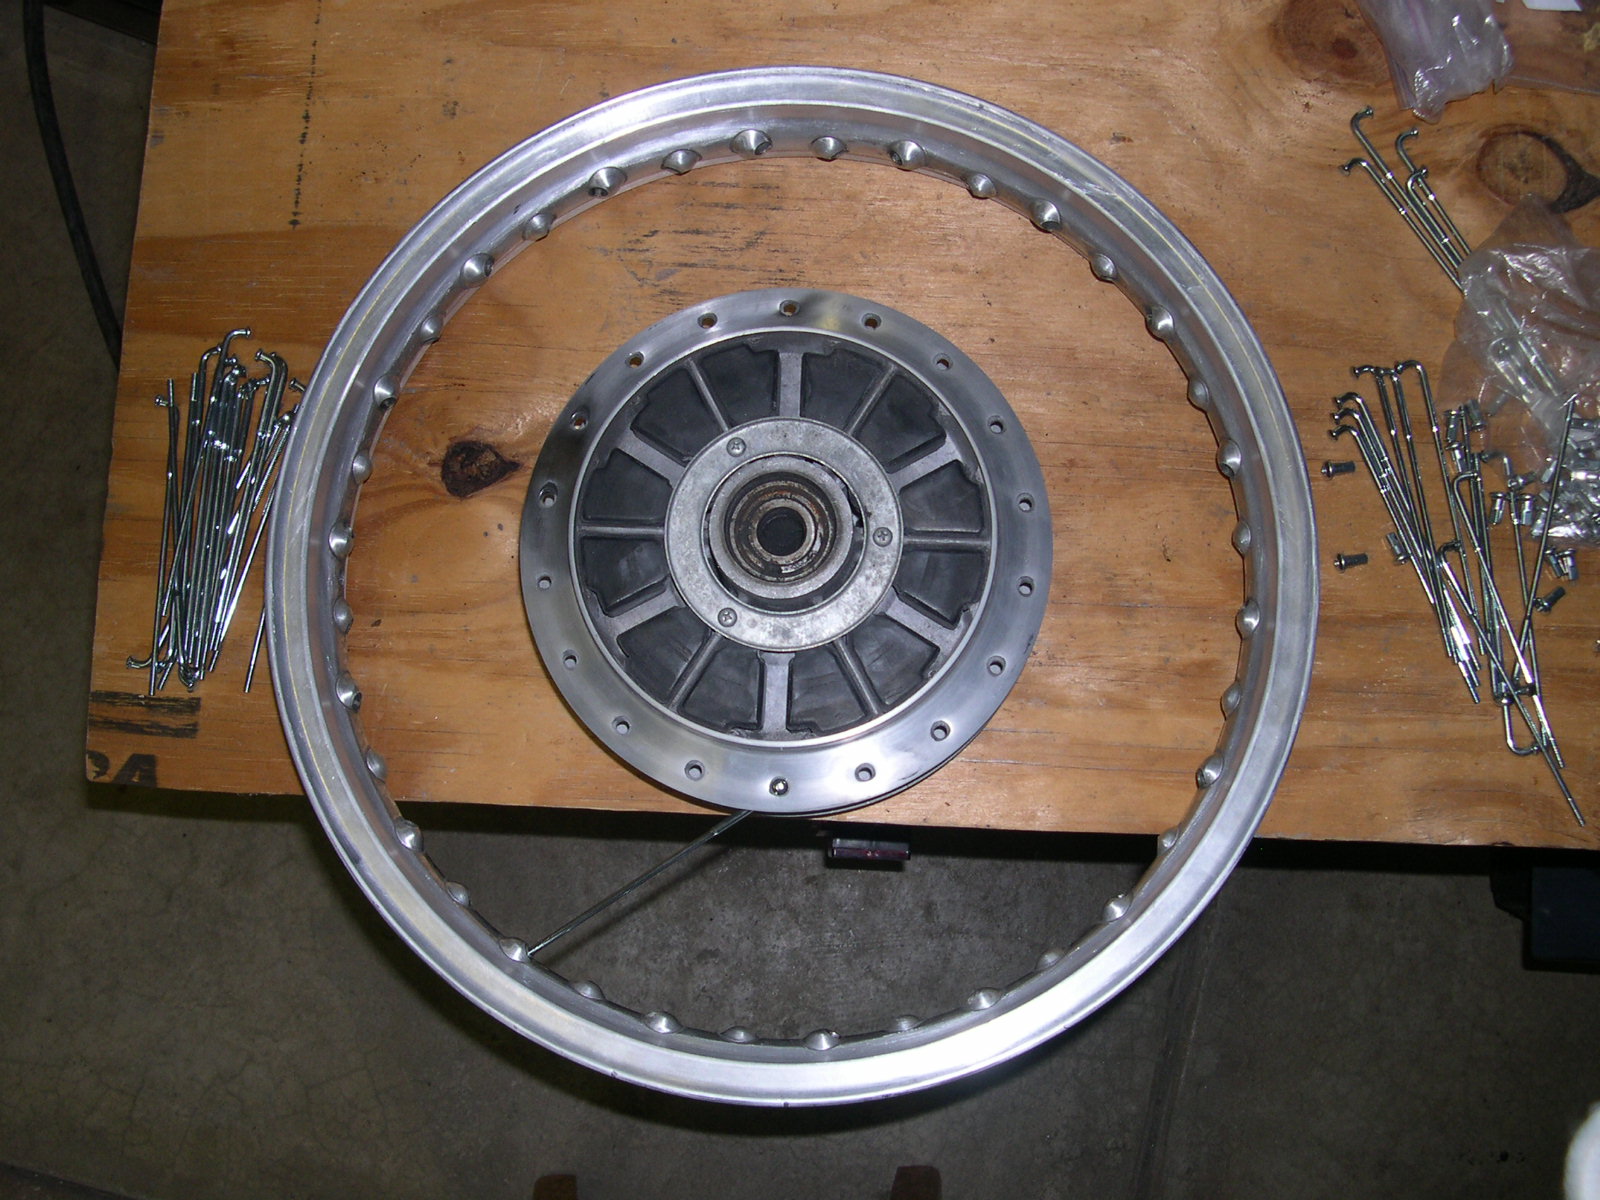
- Place the hub and rim on a workbench. It helps to have the hub and rim extending past the edge of the bench as the spokes need to drop well below the bottom of the hub and rim. Roughly center the hub inside of the rim.
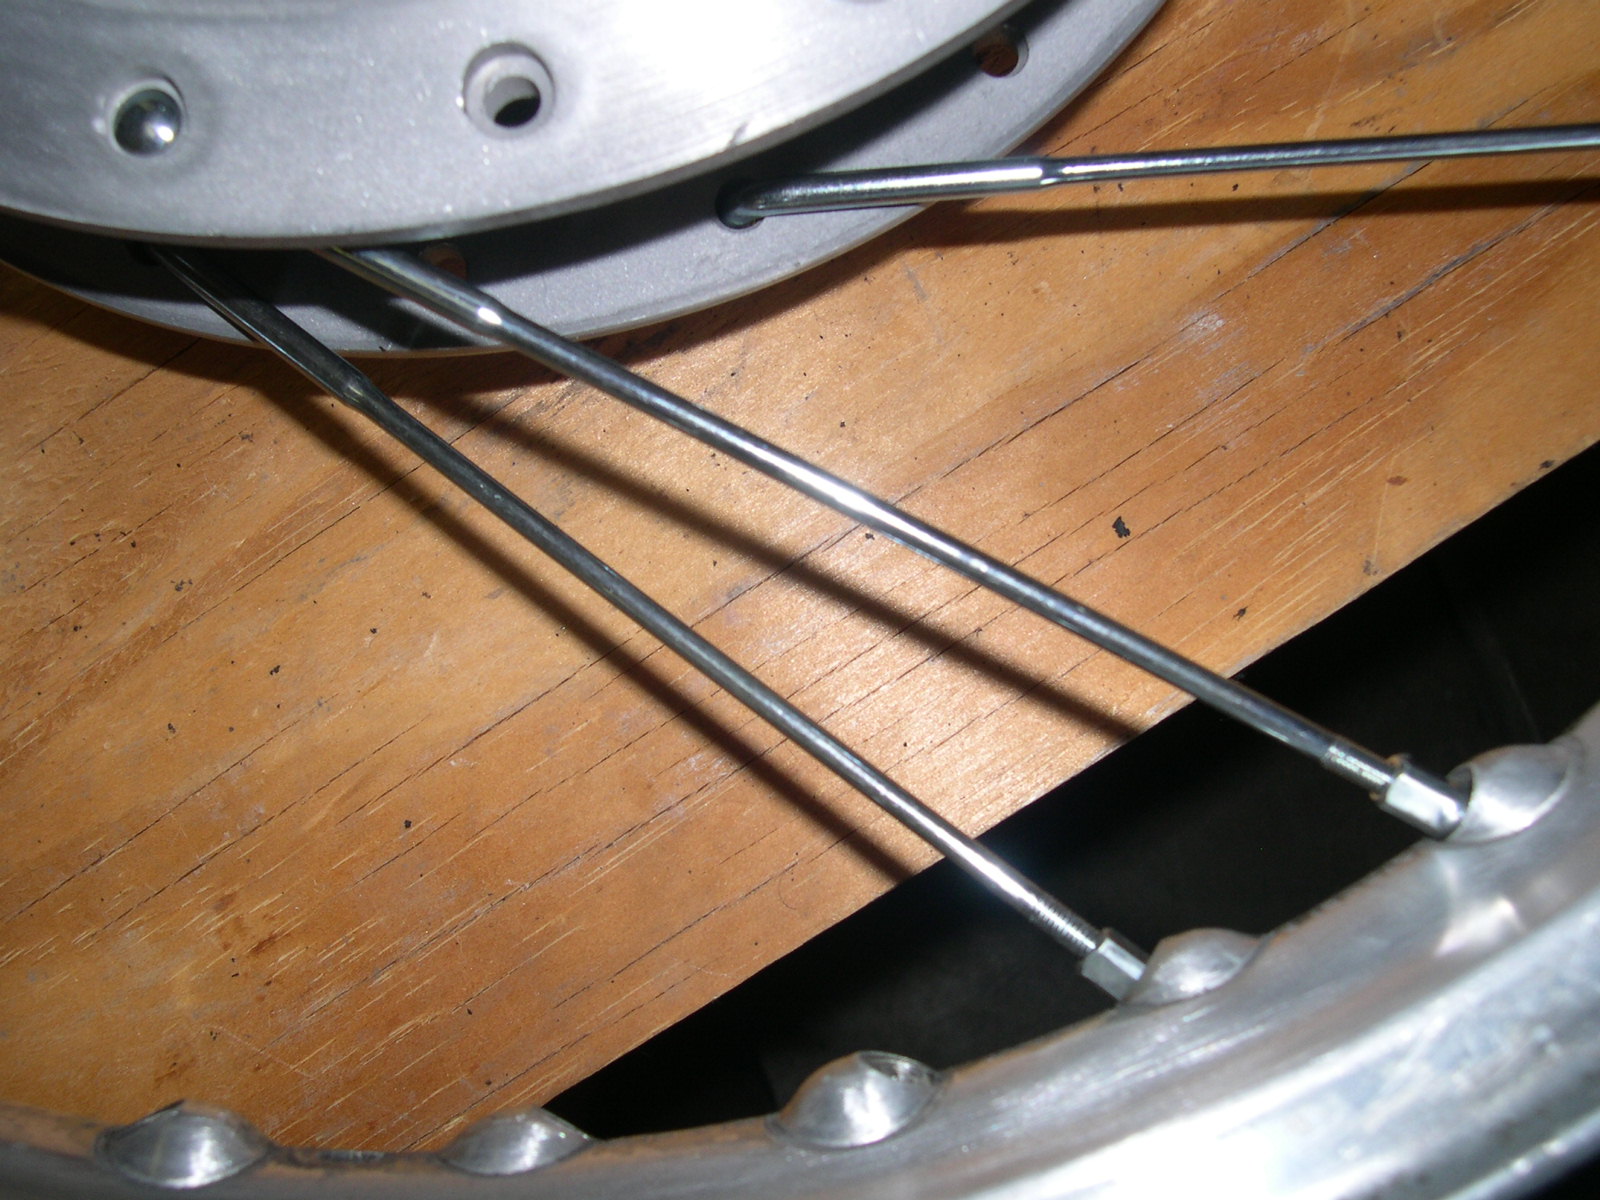
- Insert one of the lesser-bend spokes into any hub hole from the outside in, i.e. the button will be visible. Orient the threaded end of the spoke in a clockwise direction moving outward from the hub to the rim. Place the threaded end of the spoke into a rim hole that is positioned on the upper edge of the rim drop center, pointing it in the proper direction to align it with the spoke. With the hub roughly centered inside of the rim, the spoke will point to approximately 8 o'clock. Loosely screw the spoke nipple onto the threaded end of the spoke.
- Using another lesser-bend spoke, insert it into the hub hole from the outside in, two places clockwise from the first spoke. Insert the threaded end of the spoke into the rim hole, four spaces clockwise from the first spoke. Loosely screw the spoke nipple onto the threaded end of the spoke.
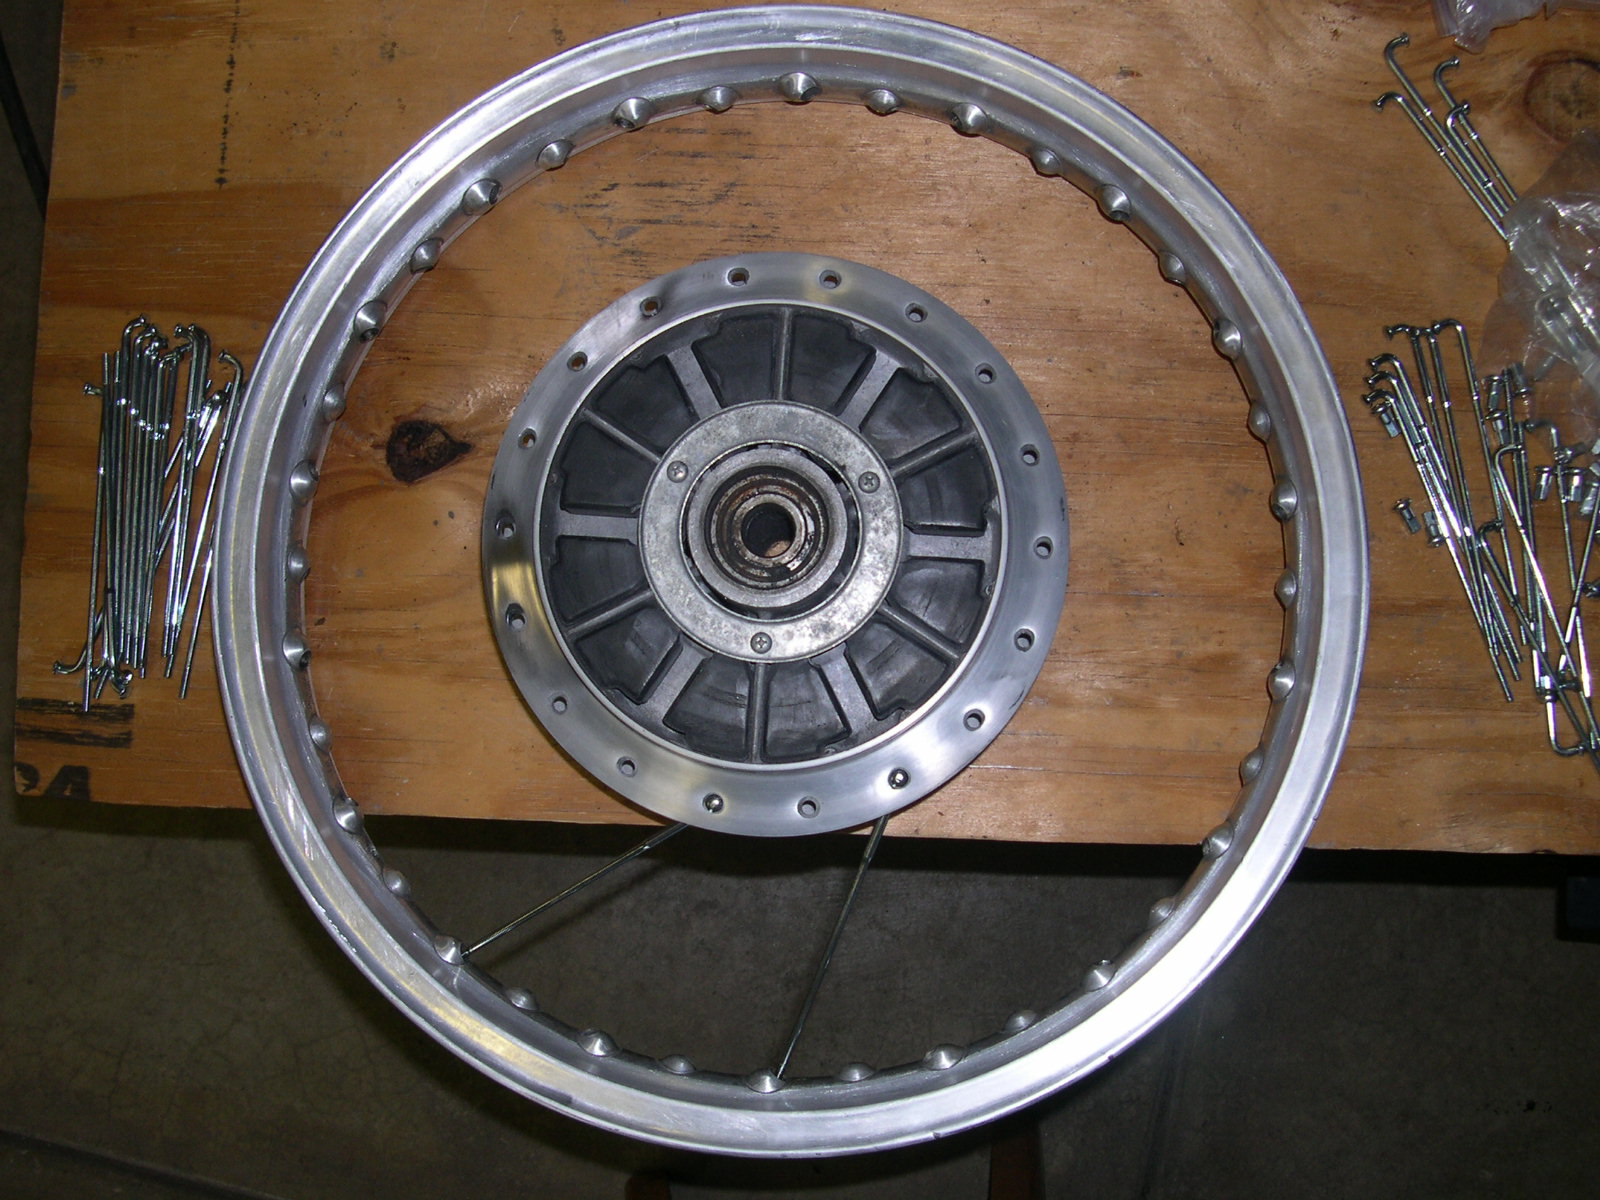
- Repeat steps 3 and 4 above, spacing the spokes two holes apart on the hub and four spaces apart on the rim. For a thirty-six-spoke rim, you'll end up with nine spokes installed.
- Flip the wheel over and spin the rim counterclockwise until the spokes are relatively evenly spaced and the hub is centered inside of the rim. Notice that the spokes are now pointing in a counterclockwise direction, moving outward from the hub to the rim.
Also note that when looking straight down, the holes in the hub sit offset between the top and bottom edges. By this, I mean that the spoke holes in the hub don't line up from left to right. Rather, they sit offset radially at half the distance between each, a detail crucial for achieving accurate spoke pattern symmetry. Sticking a spoke into a spoke hole on one side of the hub and pushing straight through will result in the spoke contacting the other side of the hub directly between two spoke holes on the opposite side.
- Looking straight down, insert a lesser-bend spoke into any hub hole just counterclockwise in relation to any lower rim edge hole that has a spoke inserted. When inserting the spoke (from the outside in with the spoke button visible), be sure to position the threaded end to the counterclockwise side of the existing spoke below. If you don't do this, you'll not be able to move the threaded end of the spoke into its designated rim hole.
- Insert the threaded end of the spoke into the rim hole just counterclockwise of the rim hole occupied by the existing spoke below.
- Repeat steps 7 and 8 above, moving in either direction around the hub and rim, inserting a lesser-bend spoke into every other hub hole and every fourth rim hole.
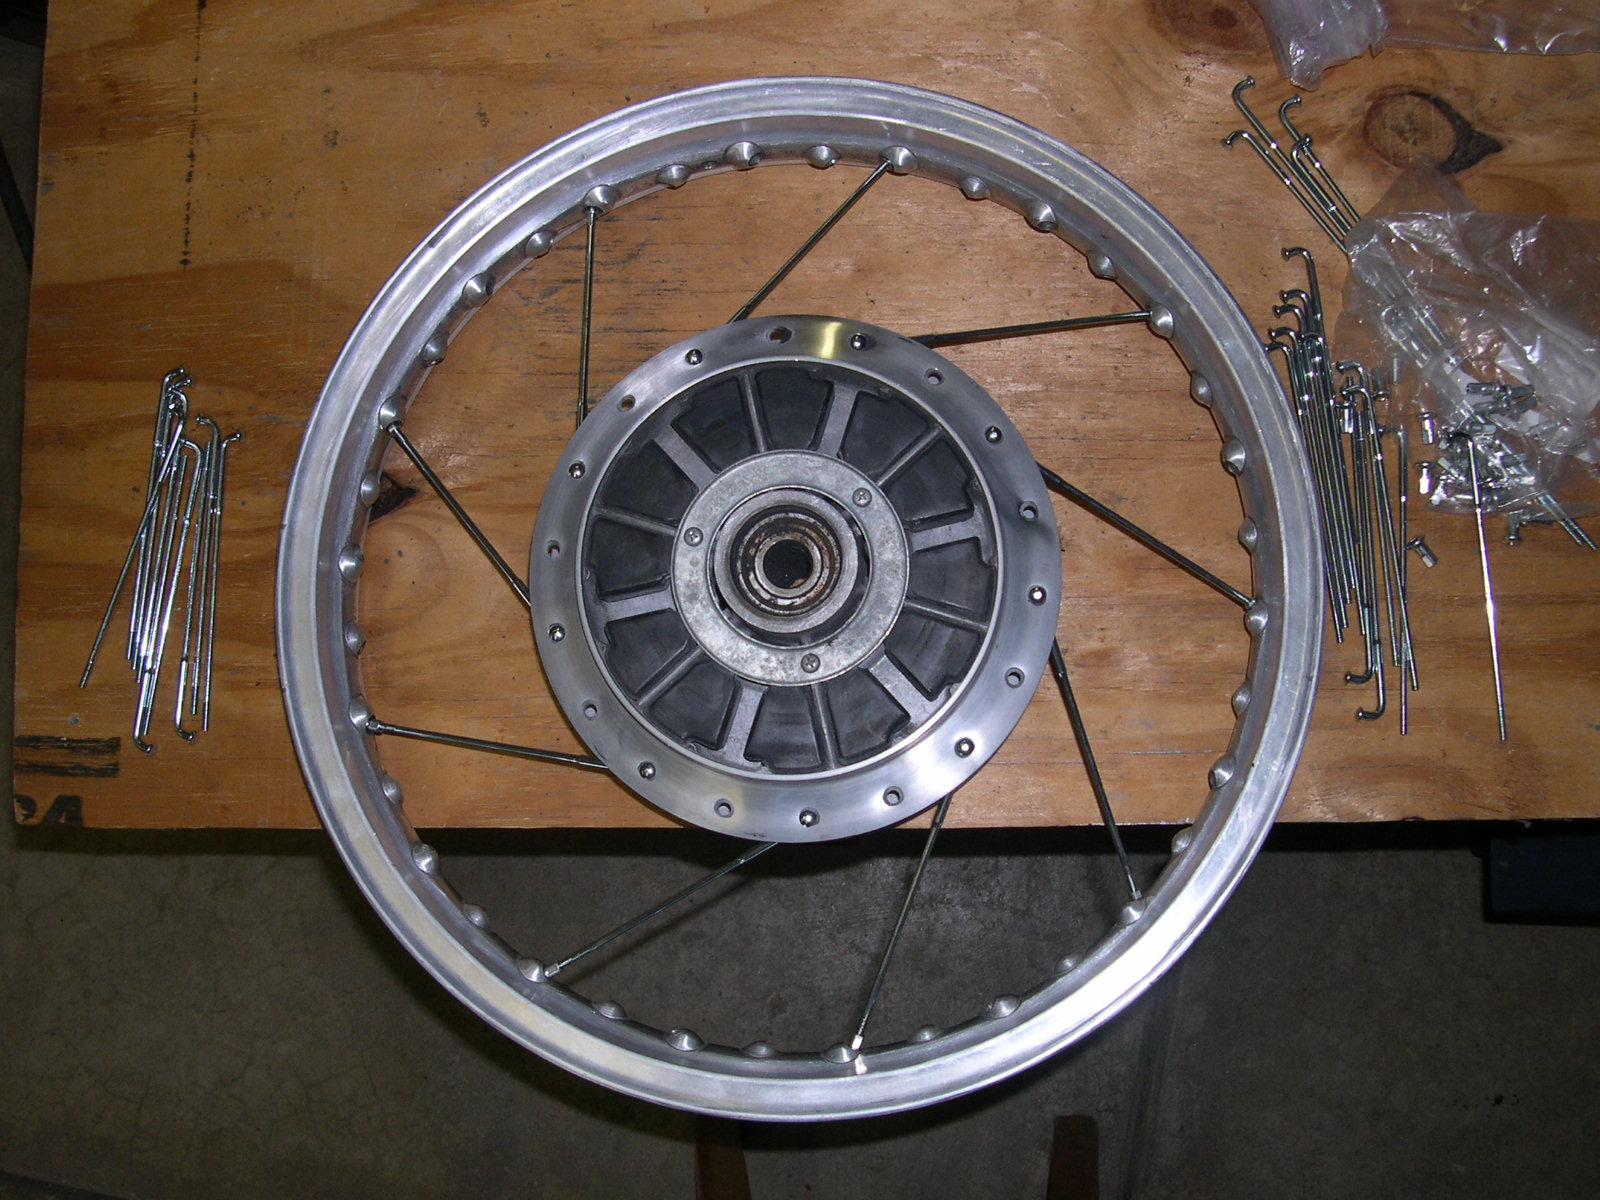
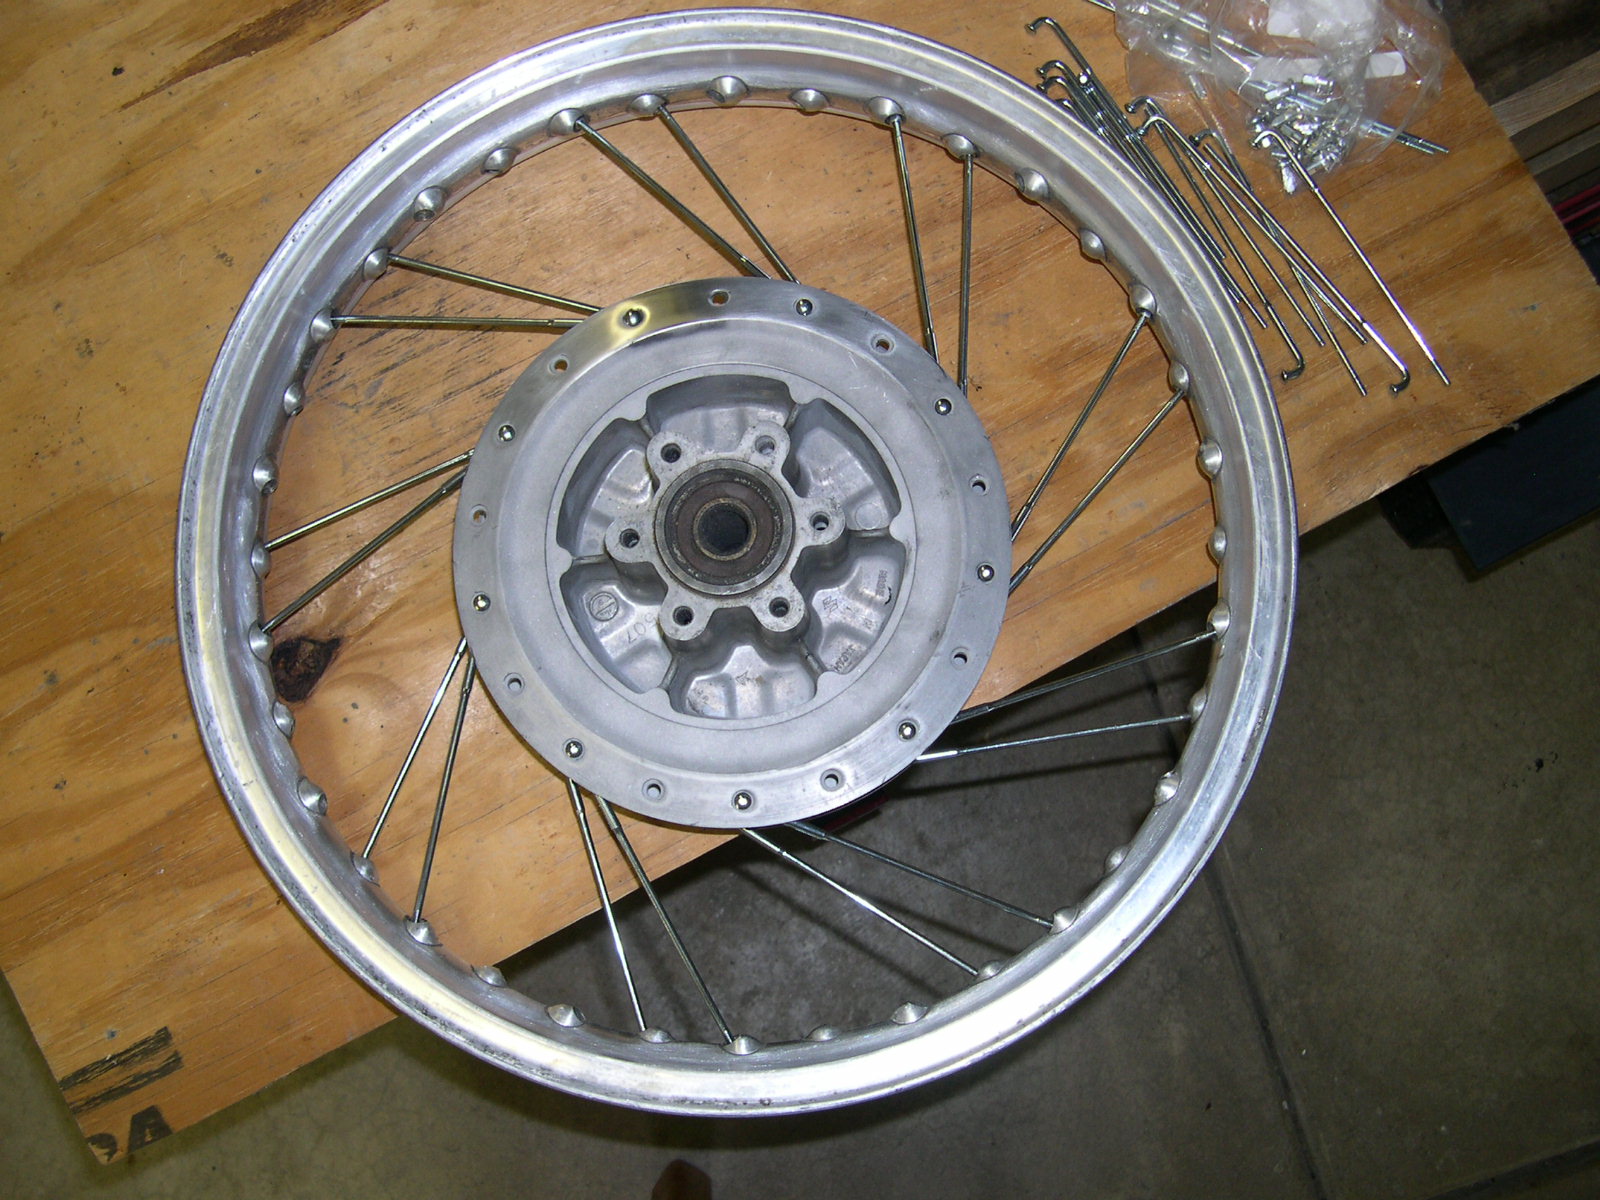
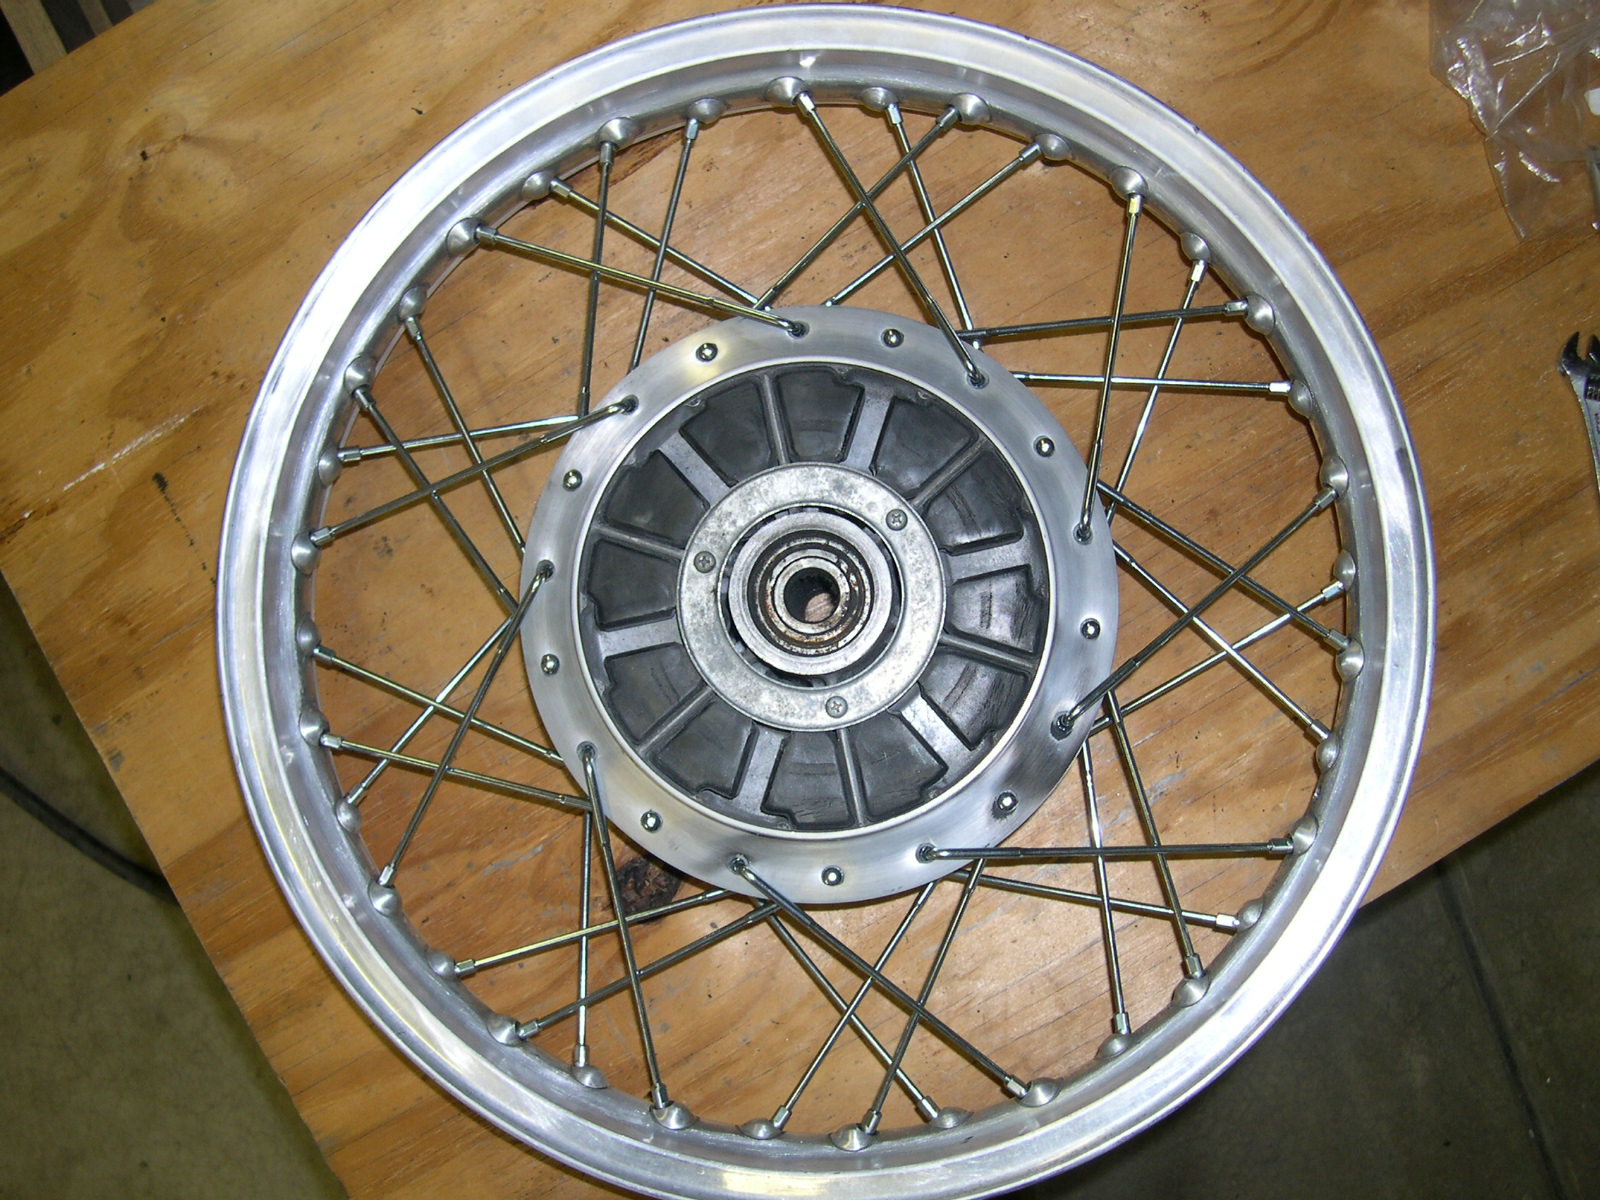
- At this point, you should have eighteen spokes installed, all of them lesser-bend. Every other hole in the hub should have a spoke inserted from the outside in with the spoke button visible from the outside. The rim should have nine pairs of adjacent spokes with two holes between each pair. The spokes should have a symmetrical pattern.
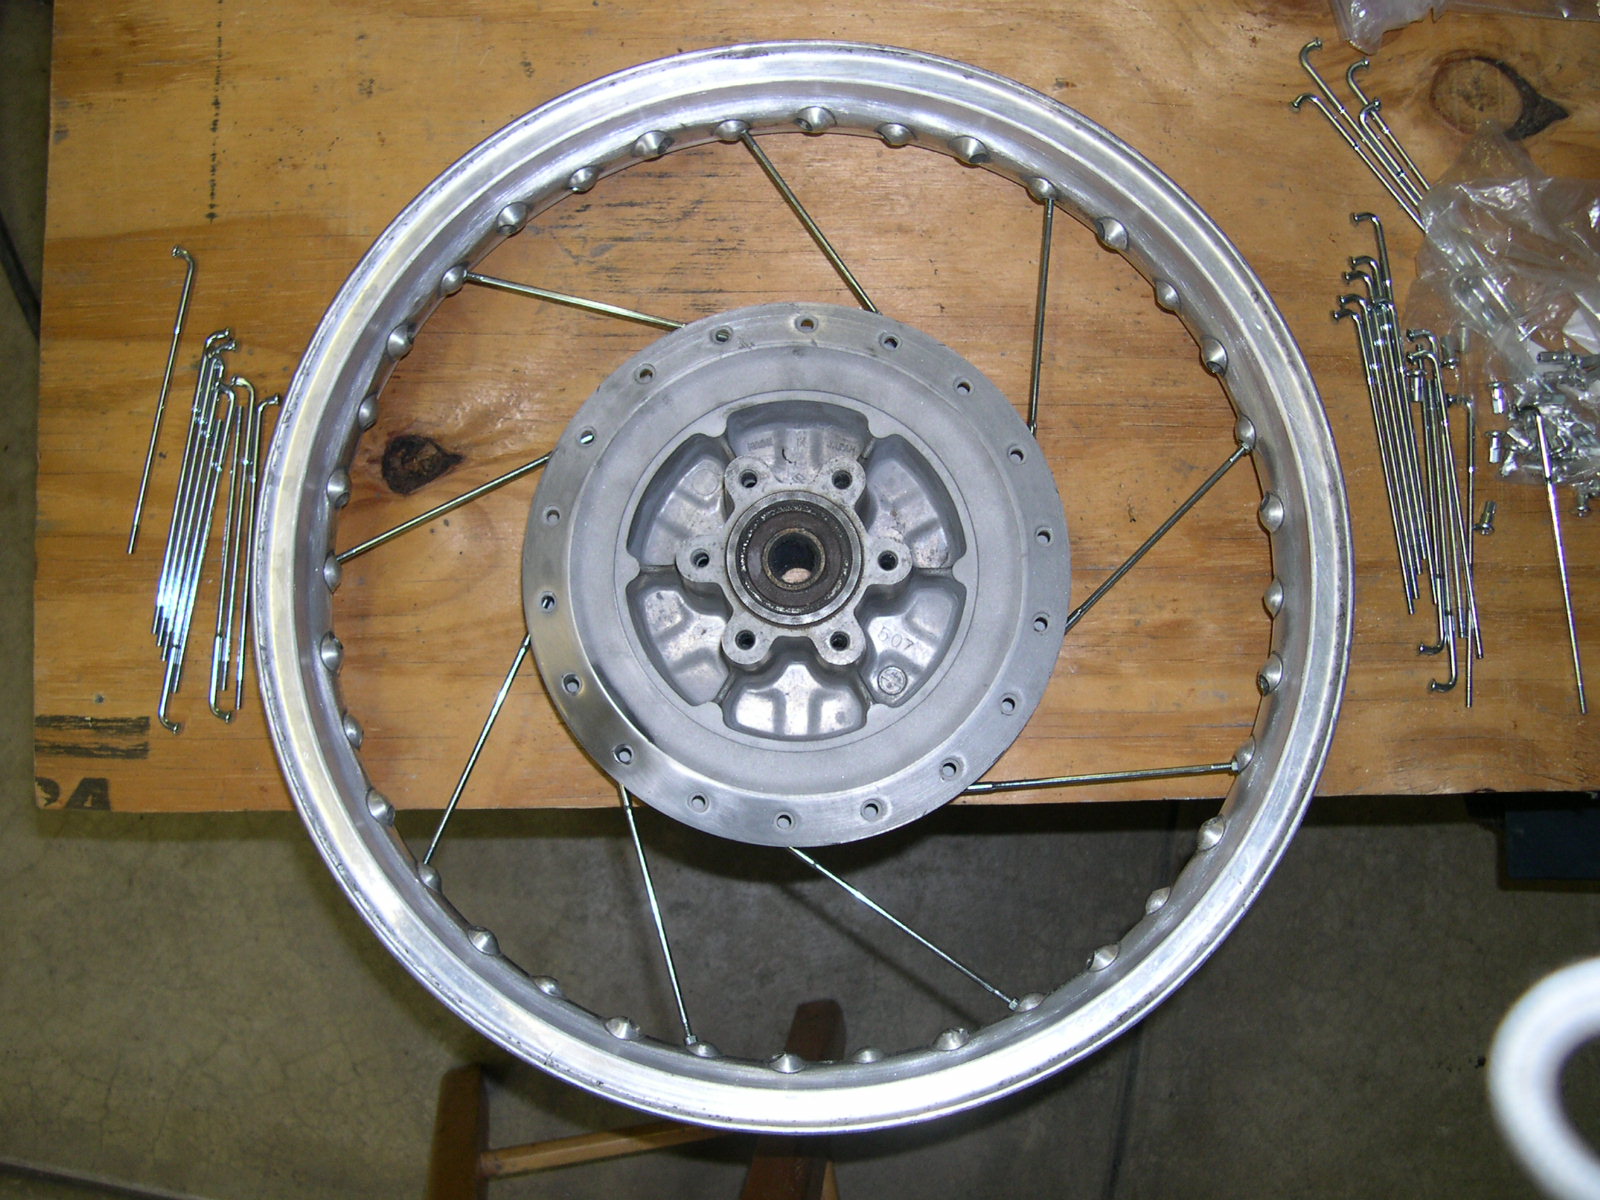
- Now grab the eighteen spokes with a tighter bend. Pick any open rim hole and insert the tighter-bend spoke from the inside out, i.e. the bend should be visible from the outside. Position the threaded end of the spoke clockwise at approximately 8 o'clock. It should clearly line up with a rim hole located on the top side of the drop center, pointing in line with the spoke. Insert the threaded end of the spoke into this rim hole and loosely screw the spoke nipple onto the spoke.
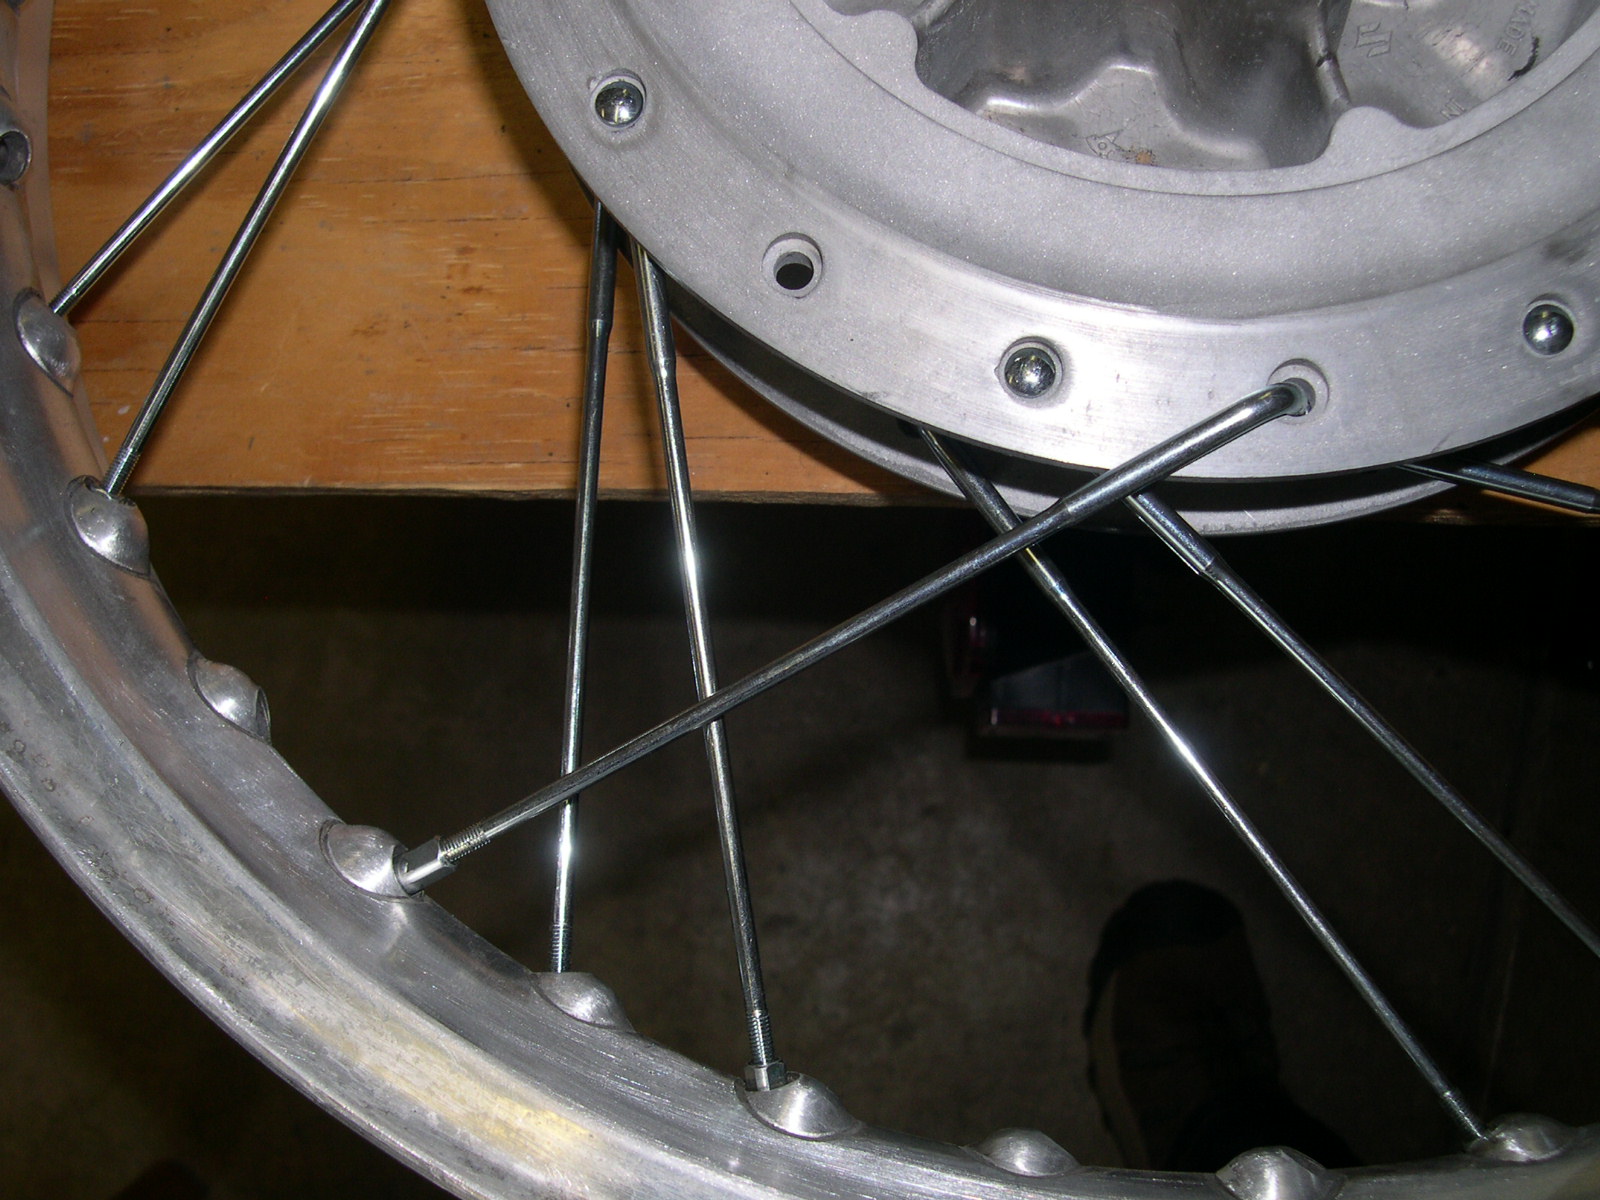
- Repeat step 11 above, moving in either direction until all rim holes on the top side have spokes installed. Again, you'll be moving two holes on the hub and four holes on the rim, regardless of direction.
- Flip the wheel over and repeat steps 11 and 12 above. This time the spokes will be pointing counterclockwise from the hub to the rim. It should be readily apparent which hub and rim holes to use for final spoke pattern symmetry and balance.
- CONGRATULATIONS! You've successfully laced a spoke wheel!
Now it's time to learn about offset and runout (part two).

Did These Wheel Lacing Instructions Work For You?
We know Joe's methods are accurate. How did you put them to use and what, if anything, did you change? Your input is invited. Leave a comment and/or write an article!
Share Link ...

About Joe Konrardy
Joe is a seasoned motorcycle traveler with 40 years of experience who enjoys both street and off-road adventures.


Thoughts gone wild? Write an article!