
Take a gander at our FTC disclosure opus here. The following article was last updated on Dec 5, 2025 ...
Don't Lose Your Bearings. Just Keep 'Em Packed!
As I type this, it's time to check and likely pack bearings for each of the four wheels on our toy hauler. There's a specific article, about a specific topic, that I'd much prefer writing but instead, here I sit, stalling. Why?
Checking and packing wheel bearings is relatively simple. I have all of the required materials and with back-to-back coffee, I'm good for it. The only reason I'm stalling is because it involves the single most tedious process a man like me faces: learning something new.
Oh, the humanity! The act of falling into the very same body print left on my couch during last night's "entire bag o' chips" session before sifting through the best (and worst) of YouTube's DIY tutorial mosh pit ... I don't know how I'll manage. We'll just have to get through it together, you and I.
Dear Diary, Pack Bearings
For round one, my lazy person's feelers are out on the Facebook blathering "In five years of playing vagabond, not once have I gone through the motions to pack bearings on our RV trailer. We had them checked once by a not-so-great mobile RV repair guy, so my question is: anybody got a line on a solid YouTube video that best explains the process? Fifth wheel. 35' give/take. Modern, eight-lug wheels."
“Pack bearings before big rides and riders breeze through miles, a quick garage job that keeps wheels smooth and weekends drama free.”
While I'm sure every one of my FB friends stopped their humble, commoner lives to assist the royalty that is yours truly, I feel it's best that I make a comparable effort. Pause for dramatic, 10+ minute "resurch" using laser beams from the sky. Profit.
Two Months Later ...
The first worthwhile reference video I found is by a likely fellow Gen-Xer, "Dan," over at Compass Roadz. Said video points to a six-lug wheel and Dexter's EZ Lube system. Having already completed my process for the first time before picking back up on this article, I will say I no longer subscribe to relying purely on Zerk fittings but the linked video does cover a lot about required products from the get-go.
Continuing my YooToob resurch, a generational leap from "X" to whatever comes with a preinstalled beard lands me smack dab on Why Wait's channel. "Husband of Megan" (sorry, I couldn't find his name and she's listed in the credits) covers a lot of ground on how to pack bearings as well as seal replacement, so much so that I've subscribed. One great tip from this video is for those who've not invested in a bearing packing tool (highly recommended).
But in my world, anything that I could get completely wrong, not only at my own expense but that of my wife's safety, means I need a committee. Enter Chip Baker RV Service out of Elephant Butte, New Mexico. Thanks, Chip!
Another Week Passes ...
Chip's a busy man but I knew he was the right guy for the job ... of kicking back and telling me what to do (at my request). The day before, I watched the following product footage, a video I myself couldn't find. I reluctantly, forcibly give credit where credit is due to Mr. Herheim.


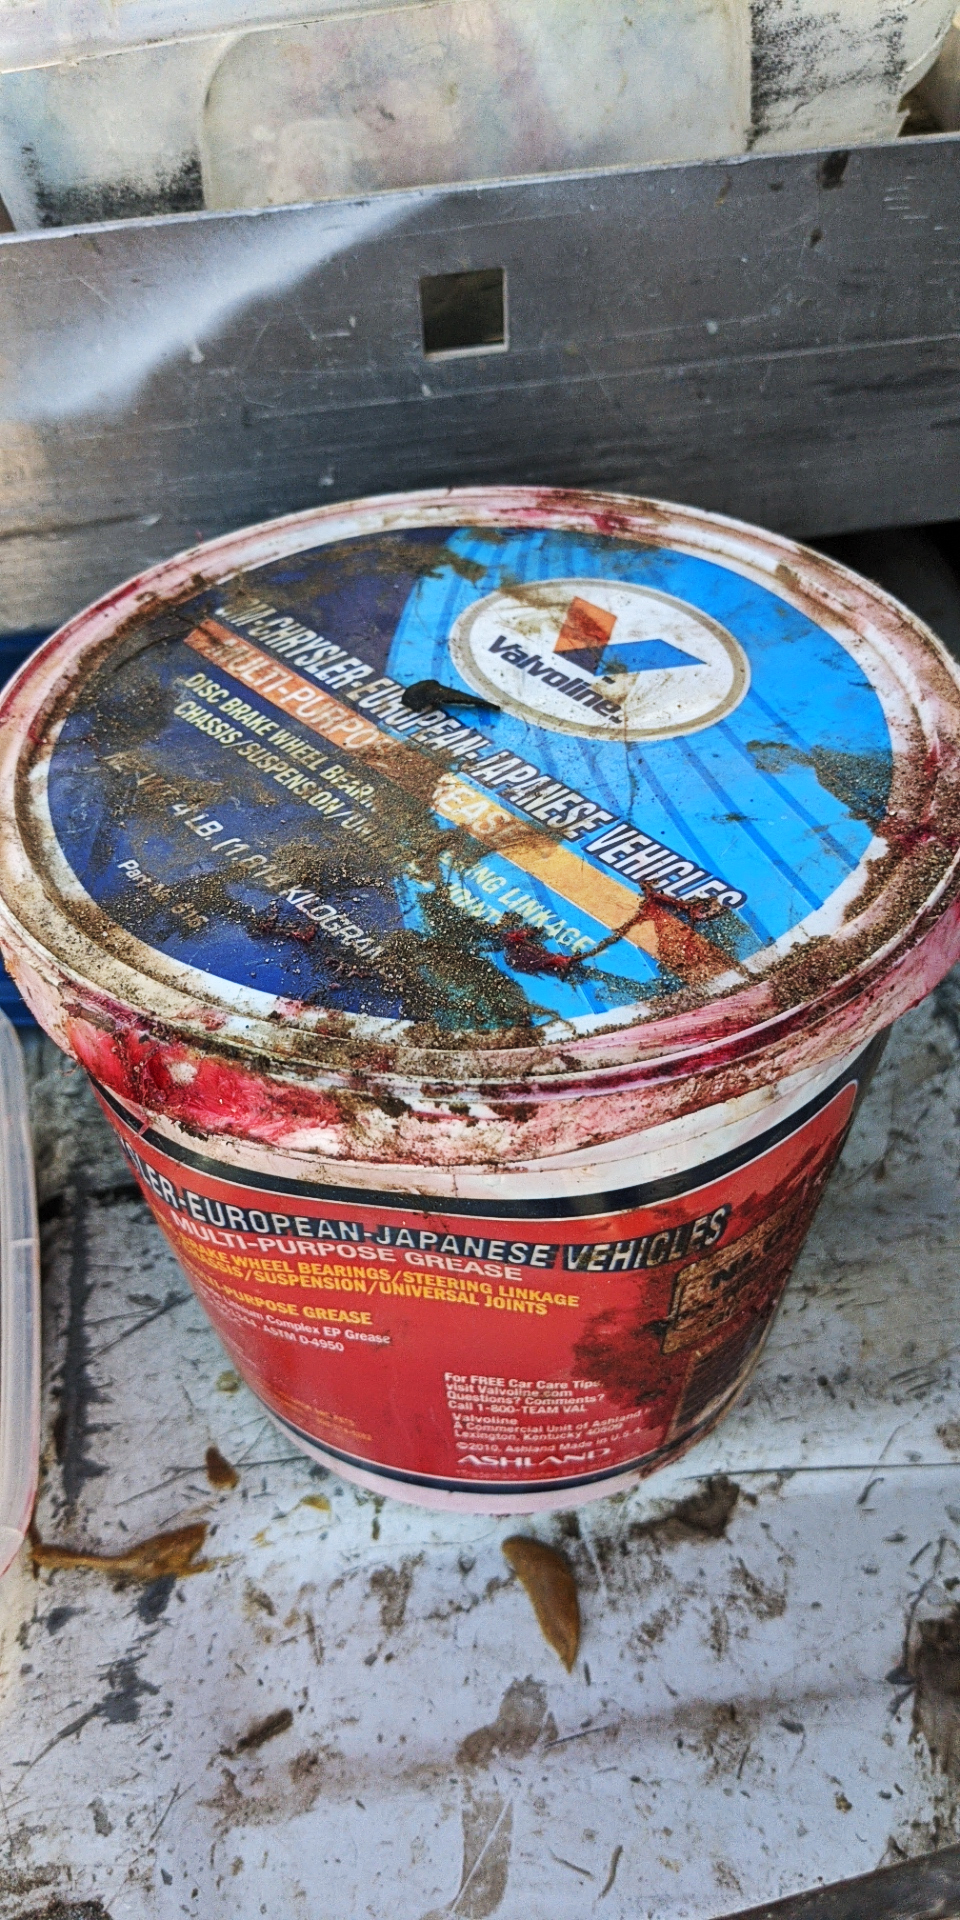
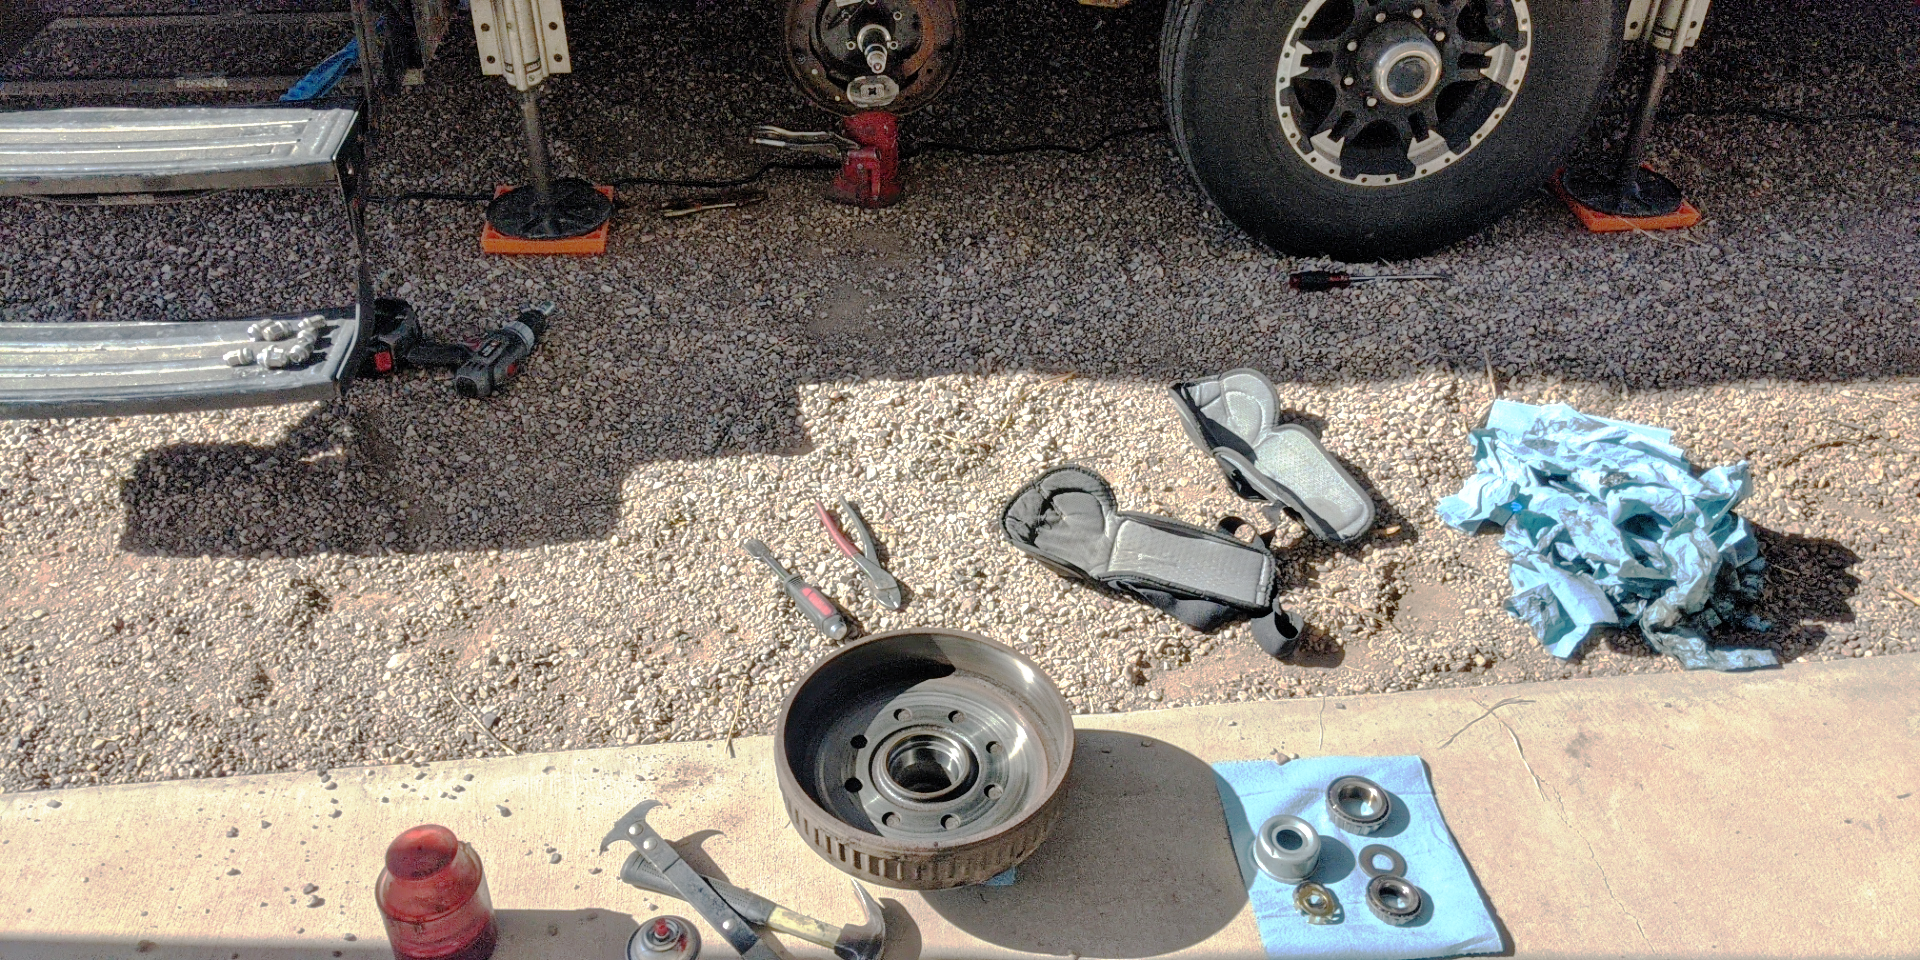
Again, my purchase of a bearing packer makes this significantly easier, as does using red grease that turns black as it expires. In hindsight, I think a drop cloth or even multiple cardboard sheets would make for a better ground-level project space. Even the EZ Lube approach can get a little messy, so an organized piece of square footage helps with cleanup (and sanity).
Pack Bearings, Step-By-Step, Wheel-By-Wheel
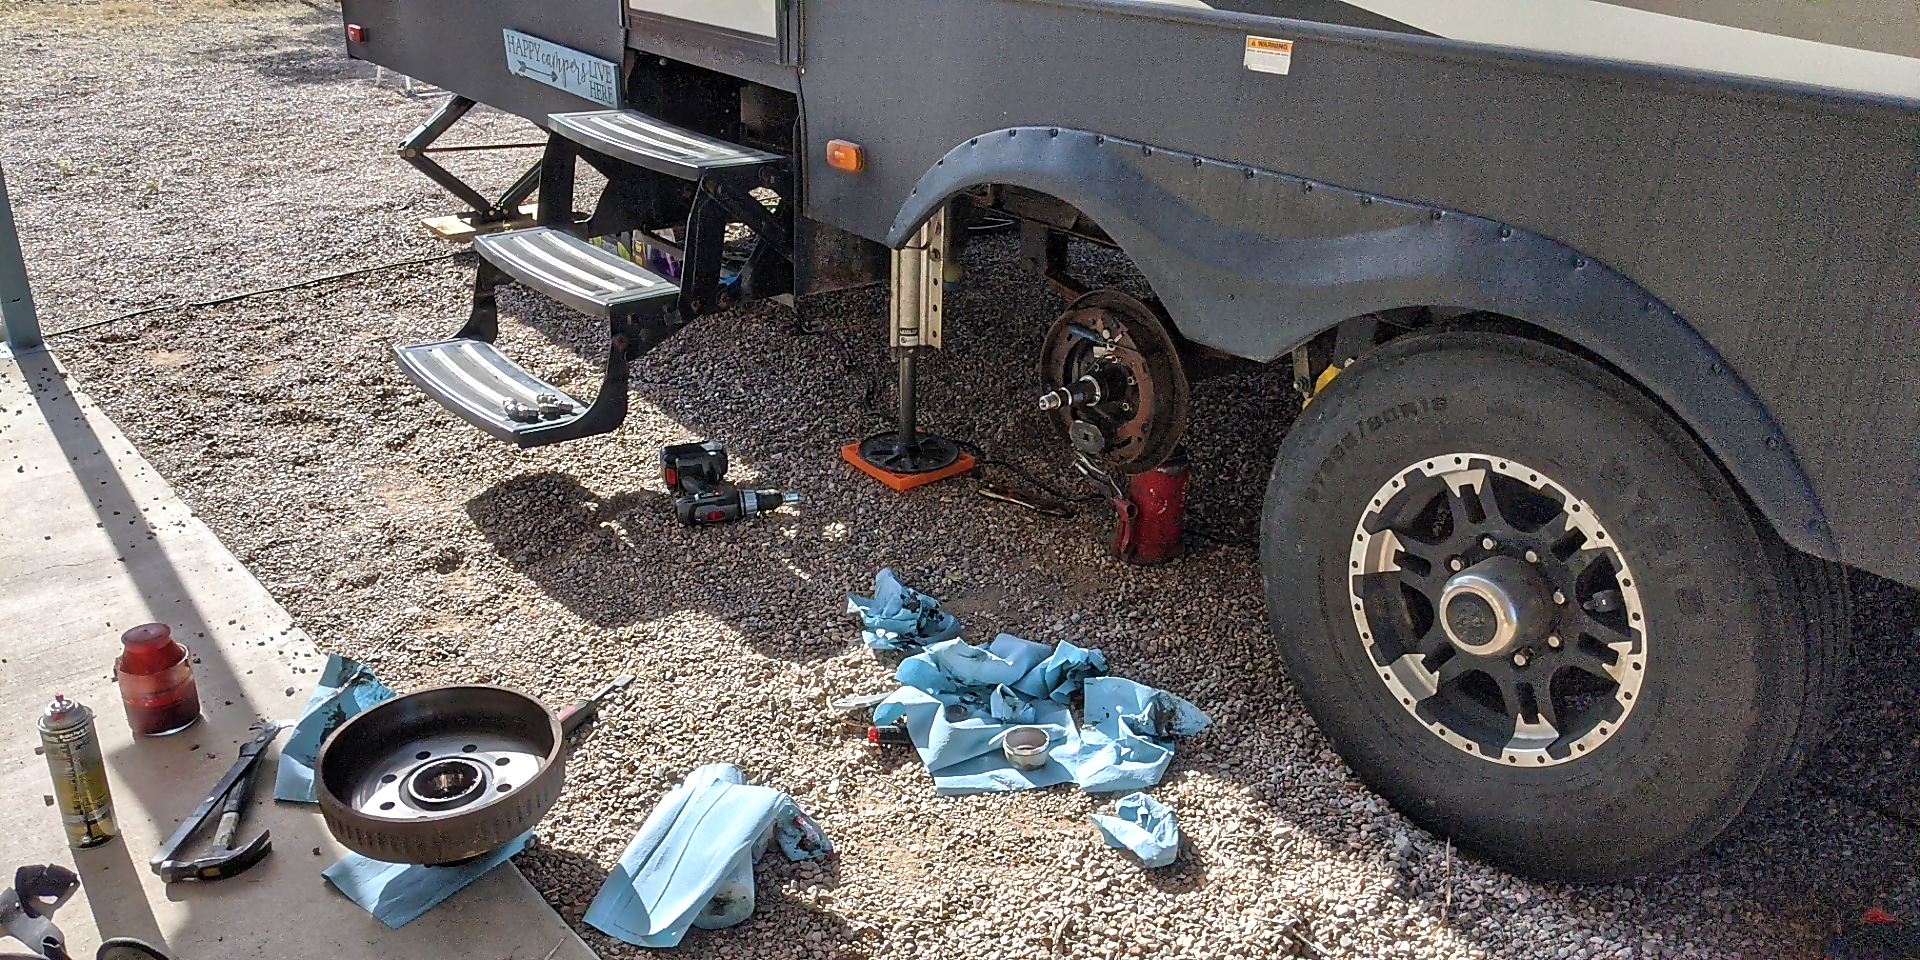
Please note that all of the instructions below are particular to our 2019 Keystone Carbon 337. Many other years/makes/models are similar, if not identical but consult your manual to be sure. Assuming your RV toy hauler has multiple axles, the "Why Wait" video makes a good point about removing only one wheel at a time. If any of your toy hauler support legs should fail, having at least one wheel on each side will mitigate the threat. That's less expensive.
- Remove A Wheel - Use your hydraulics or a bottle jack (such as the one that's often included with your tow vehicle). For the latter, place the jack about three inches from the wheel's hub and lift with direct contact under the axle. Only raise the wheel high enough that it turns freely, maybe 1/2" off the ground at most. Grab your breaker bar and an impact wrench with socket attachment. Loosen all lugs in a star pattern, then remove each from bottom to top. This allows the wheel to hang from the last lug up high. I like to use my feet to raise/hold the wheel in position while removing the last lugs so that no damage is done to the threaded studs.
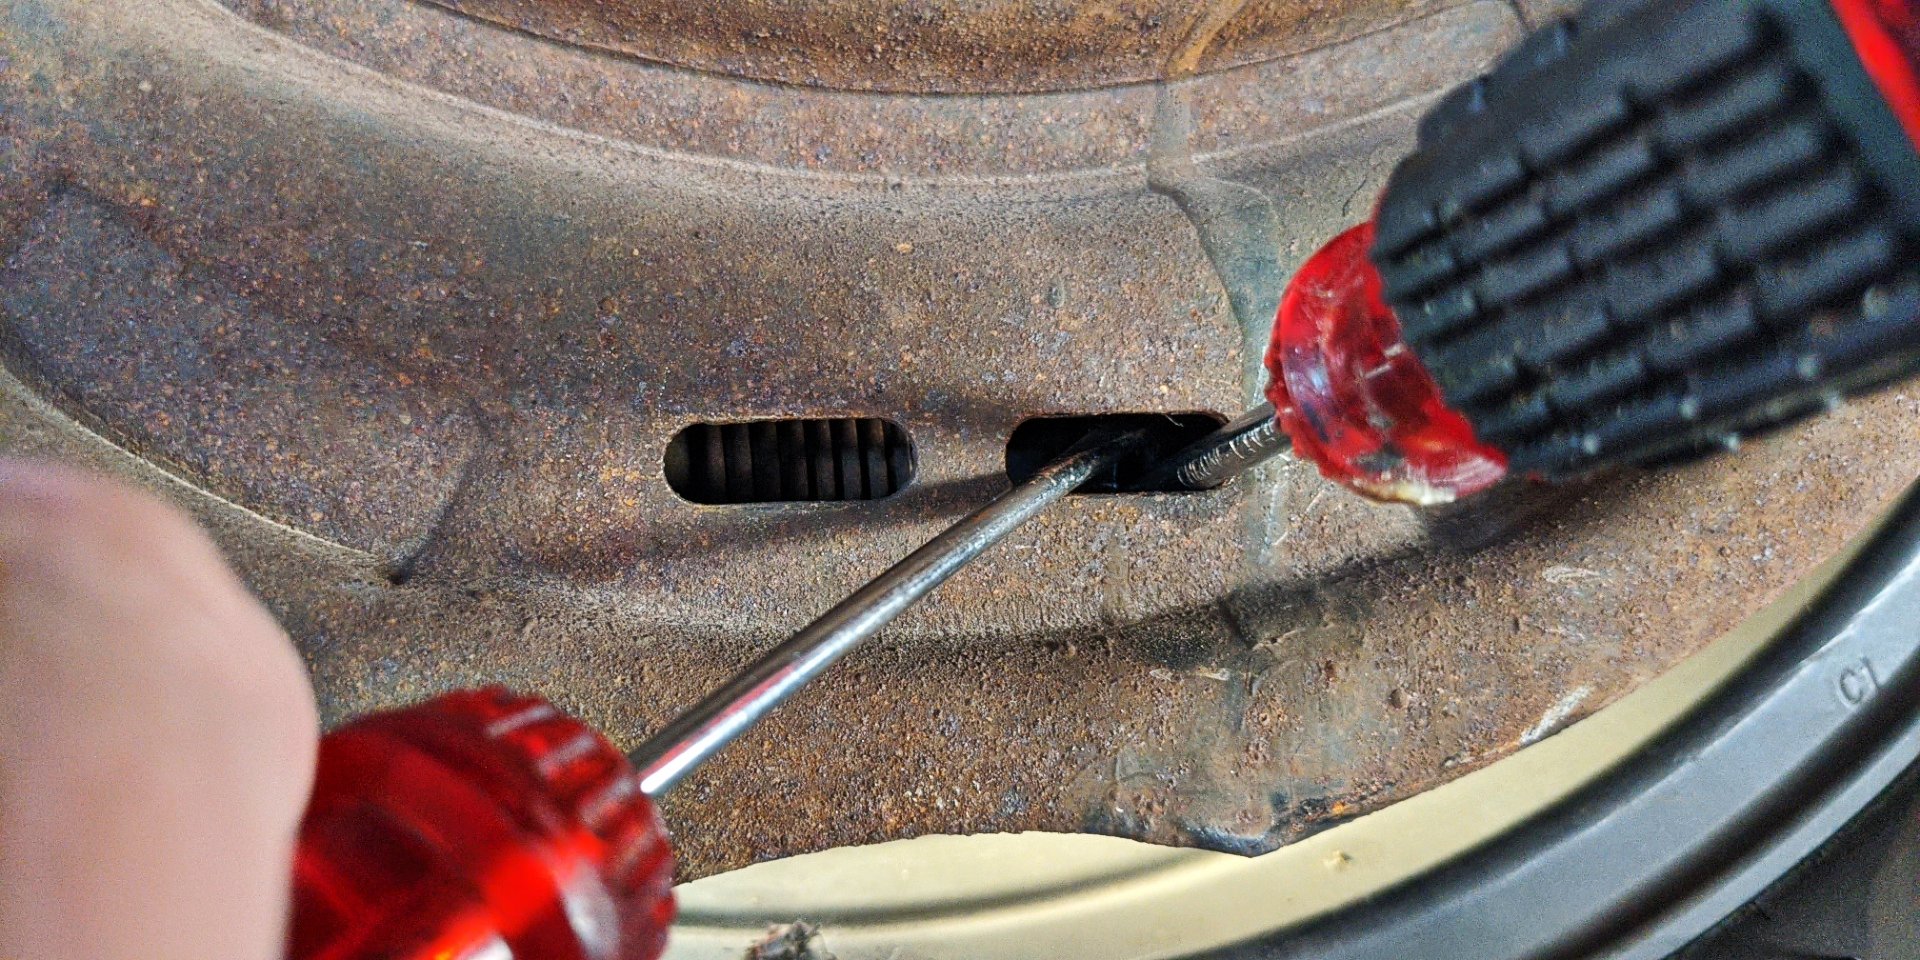
- Pry Off (Shouldered) Dust Cover - All these do is keep objects and debris from bombarding the bearings. That doesn't mean we want to go at them with a chainsaw. Grab your smallest, sharpest, pokiest screwdriver and a rubber mallet before gently tapping under its shouldered lip. Try not to puncture anything and work your way around to unseat it completely. A little bit in multiple locations is better than all of the ruin in one spot.
- Remove Clip/Crown Washer - The bolts to my hubs have a lavish, golden bolt locker that looks like a crown once removed. That crown is designed to fit over both the flat and corner sides of their designated bolt. Be gentle and try not to bend. Use the same "multiple locations" technique as you did while unseating the dust cover.
- Remove the Hub Mounting Bolt/Washer - What's this? The bolt is loose, you say? Yes ... yes, it is. You should be able to turn it loosely by hand. That's by design. If not, loosen it as you would anything else, but make a note that you won't be snugging this at all during re-installation. Underneath this bolt, you'll find a "D"-washer. It's humorously resistant due to its shape, but ... remove that as well.
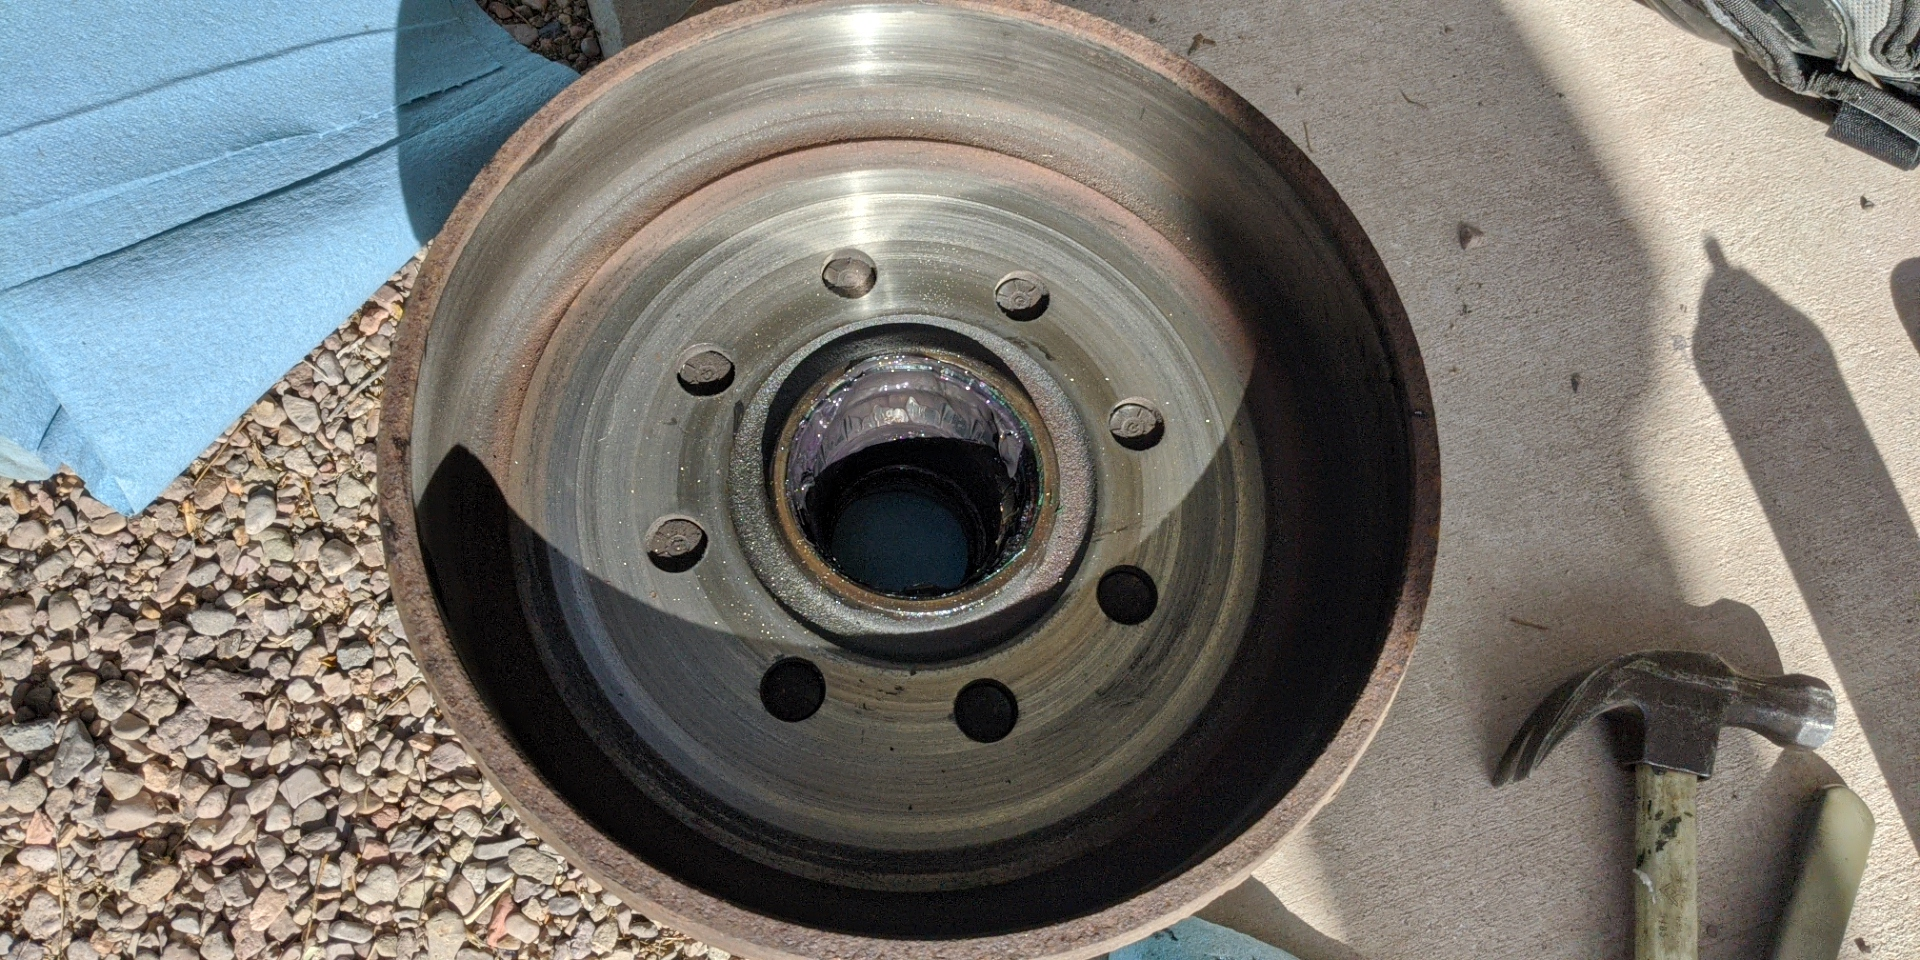
- Remove Small Bearings - Without marring, bending or stabbing anything, remove the small bearings and place them somewhere clean. If they fight you, it's okay to begin pulling the hub away from the axle, but be ready to catch them on something suitable if they fall. It's difficult to reinstall these bearings "wrong," but do observe their trapezoidal shape and the direction in which they were inserted.
- At this point, you can pull the hub and place it on its exterior "knob" side, allowing access to the seal. Use a seal puller and rubber mallet to, well, destroy this thing (do not reuse). Don't go crazy, as there are parts underneath we want to protect.
- Brake Inspection - Inspect the brake pads and mechanism for wear and tear. Spray everything down with brake parts cleaner. Apply aerosol grease to any metal mechanical parts that come into contact with one another during activation. You can "fake" actuation by pressing parts toward the bottom, which will cause the top to "scissor" back and forth as well as self-adjust (if you have self-adjusting brakes).
- Remove Large Bearings - These tend to be easier to remove by hand. Again, no harm in noting the direction of their tapered installation.
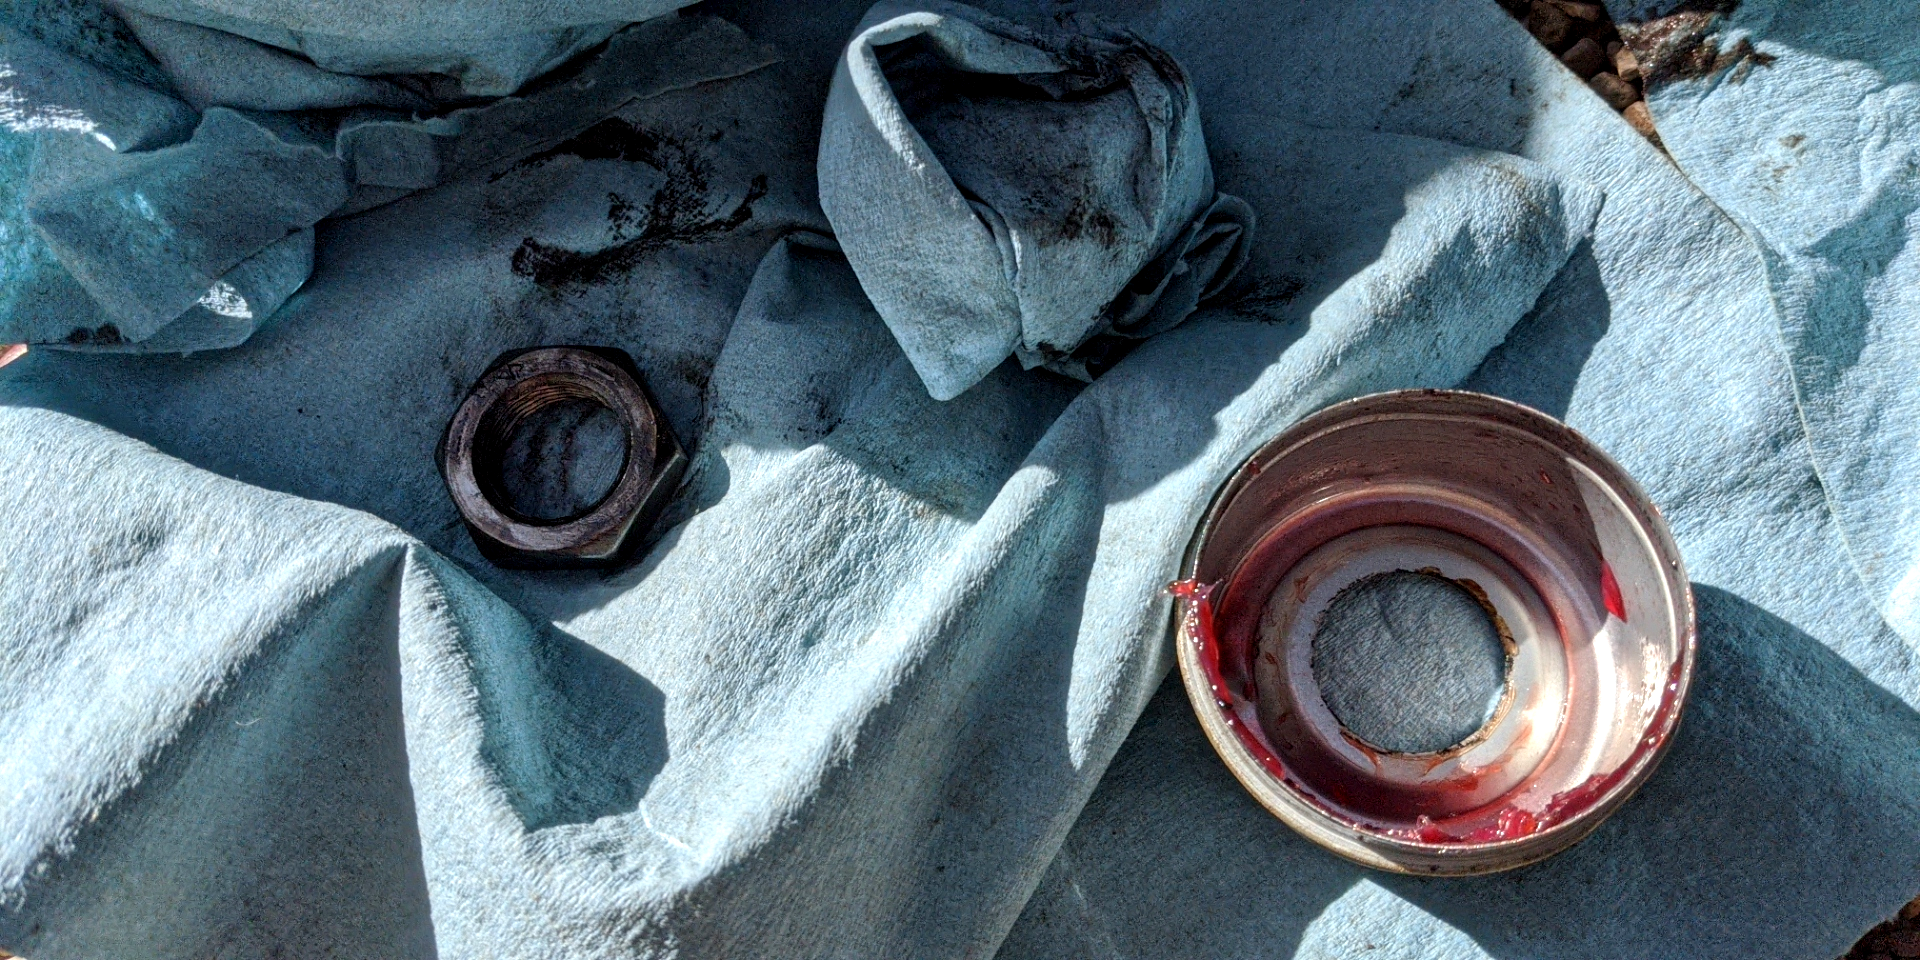
- Clean Everything - There's no need for chemical solvents, really. A box full of blue shop towels will go quickly but does the trick. Wipe it all down until there are no obvious signs of expired grease, grime, dirt, debris, lost jewelry, tax records or fake IDs. And if you miss some, no big deal. We'll be applying so much new grease, the rest will simply get absorbed into the collective (old grease doesn't "contaminate" new).
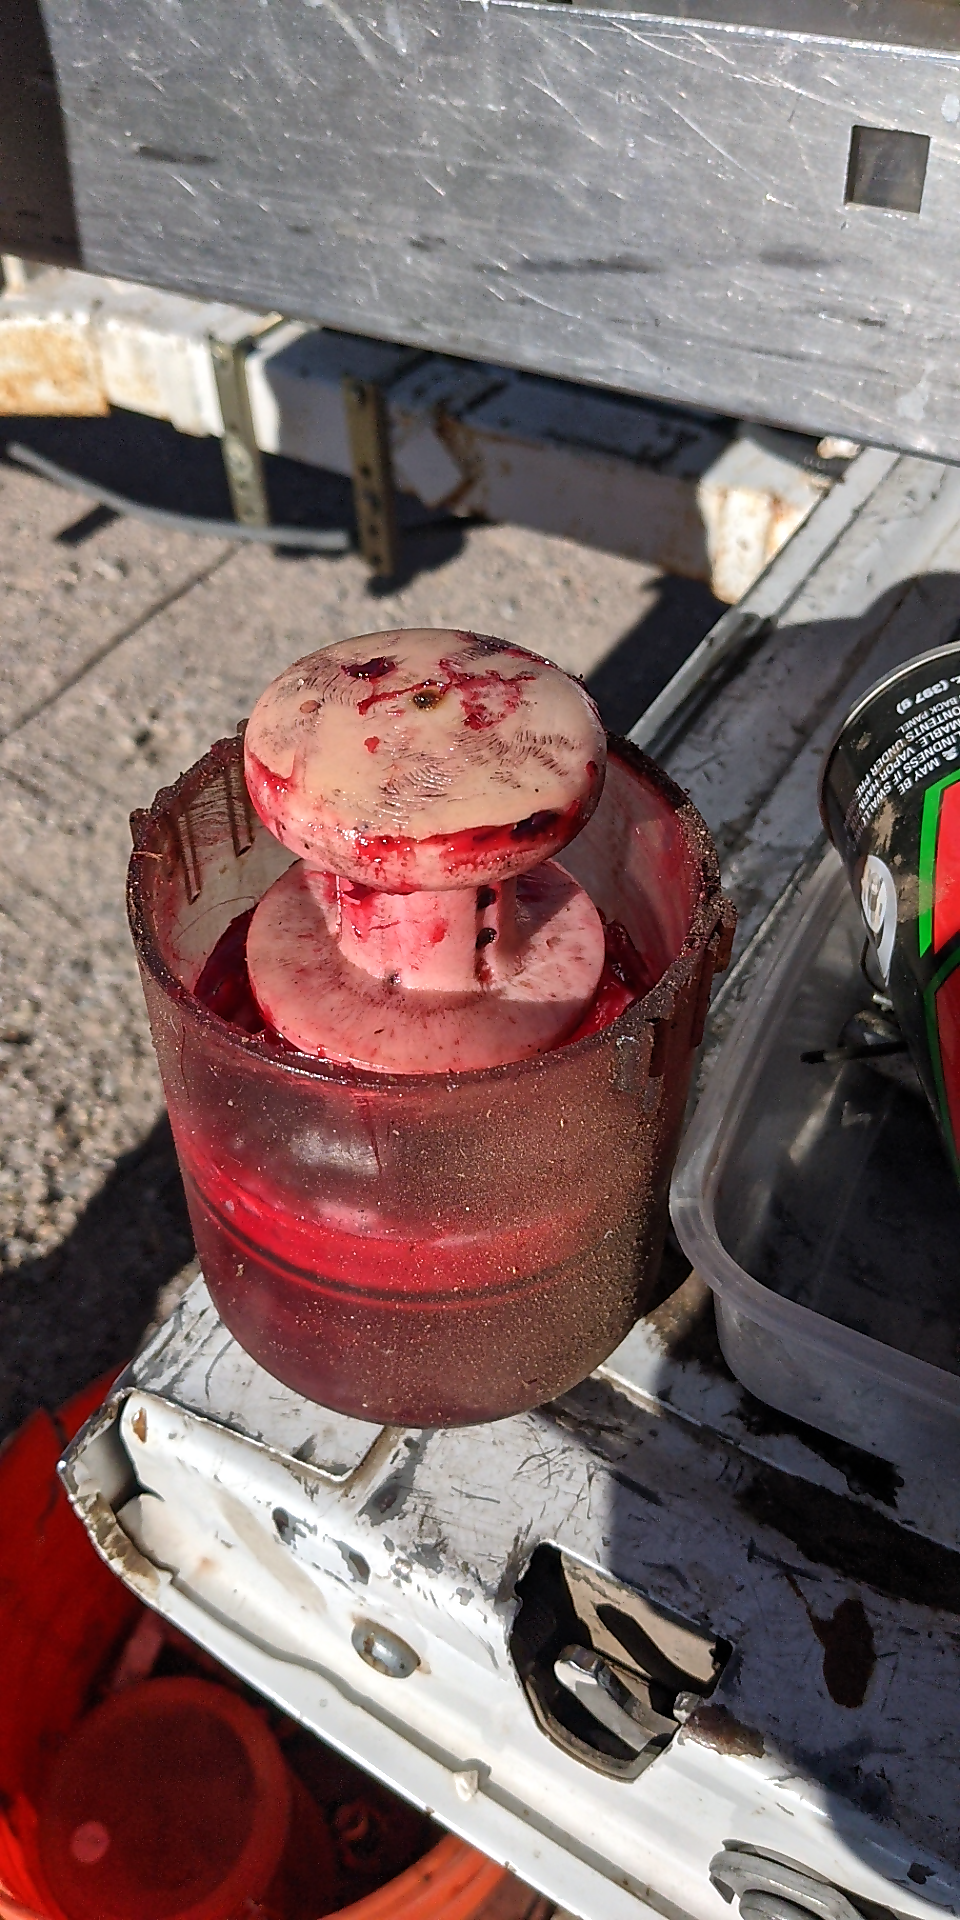
- Pack Large Bearings - We're at the summit. Disassemble your bearing packer tool and fill it with grease. Place the large bearings small-side down over the center rod, then place the compression cone onto the same rod and into the bearing outlet. Press down until all expired (black) grease is evacuated and red (new) grease appears. Remove the large bearings in their current messy state, complete with excess grease to spread over their exterior as you place them back into their sparkling clean hub.


- Install New Seal - Lightly grease the outer edge of a new seal. Position it onto the hub so that it's ready to be compressed into place. Use a small block of wood and a rubber mallet to seat. Use two medium taps, then check the angle at which it sits; then tap the higher side to balance before carefully "thunk" knocking it into place.
- Reposition The Hub - While positioning the hub back onto the axle, be careful not to rest its weight on the new seal. If the brake pads cause resistance, turn it like a steering wheel while applying lateral pressure and it'll eventually find its way on.
- Pack Small Bearings - Use the same technique as with the large bearings. Once packed, carefully position them back onto the hub directly, making sure to keep them away from dirt, sand, dust and debris.
- Now, About That Washer & Mounting Bolt - First, get that "D"-shaped washer back on, followed by the ... come on ... thread ... come ooon ... bolt! Turn the mounting bolt by hand until it stops. Then, while spinning the rotor in the direction of travel, use channel locks to "compress" the bearings gently into place. Don't tighten at all, not even to "snug." Loosen the mounting bolt and, again, tighten by hand until it stops. Now back the bolt off 1/8 turn (it will feel just slightly loose) and reinstall the crown washer ... which fits over both the flat and corner sides of the mounting bolt.
- Dust Seal, Then Wheel - Grease the shouldered lip of the dust seal and, with a small block of wood as a buffer, knock it back on with a rubber mallet. Reposition the wheel and remount (no need to torque lug nuts just yet).
Don't Lower The Jack Yet! (Time To Adjust The Brakes)
- Check For Brake Adjustment - Our RV has old-school brake shoes. That means there should be a definite but minimal amount of constant friction. Spun gently (enough to cause two full revolutions), any given wheel should only be able to rotate 1.25 times before the brakes bring it to a halt. Anything more than this and they'll definitely need to be adjusted.
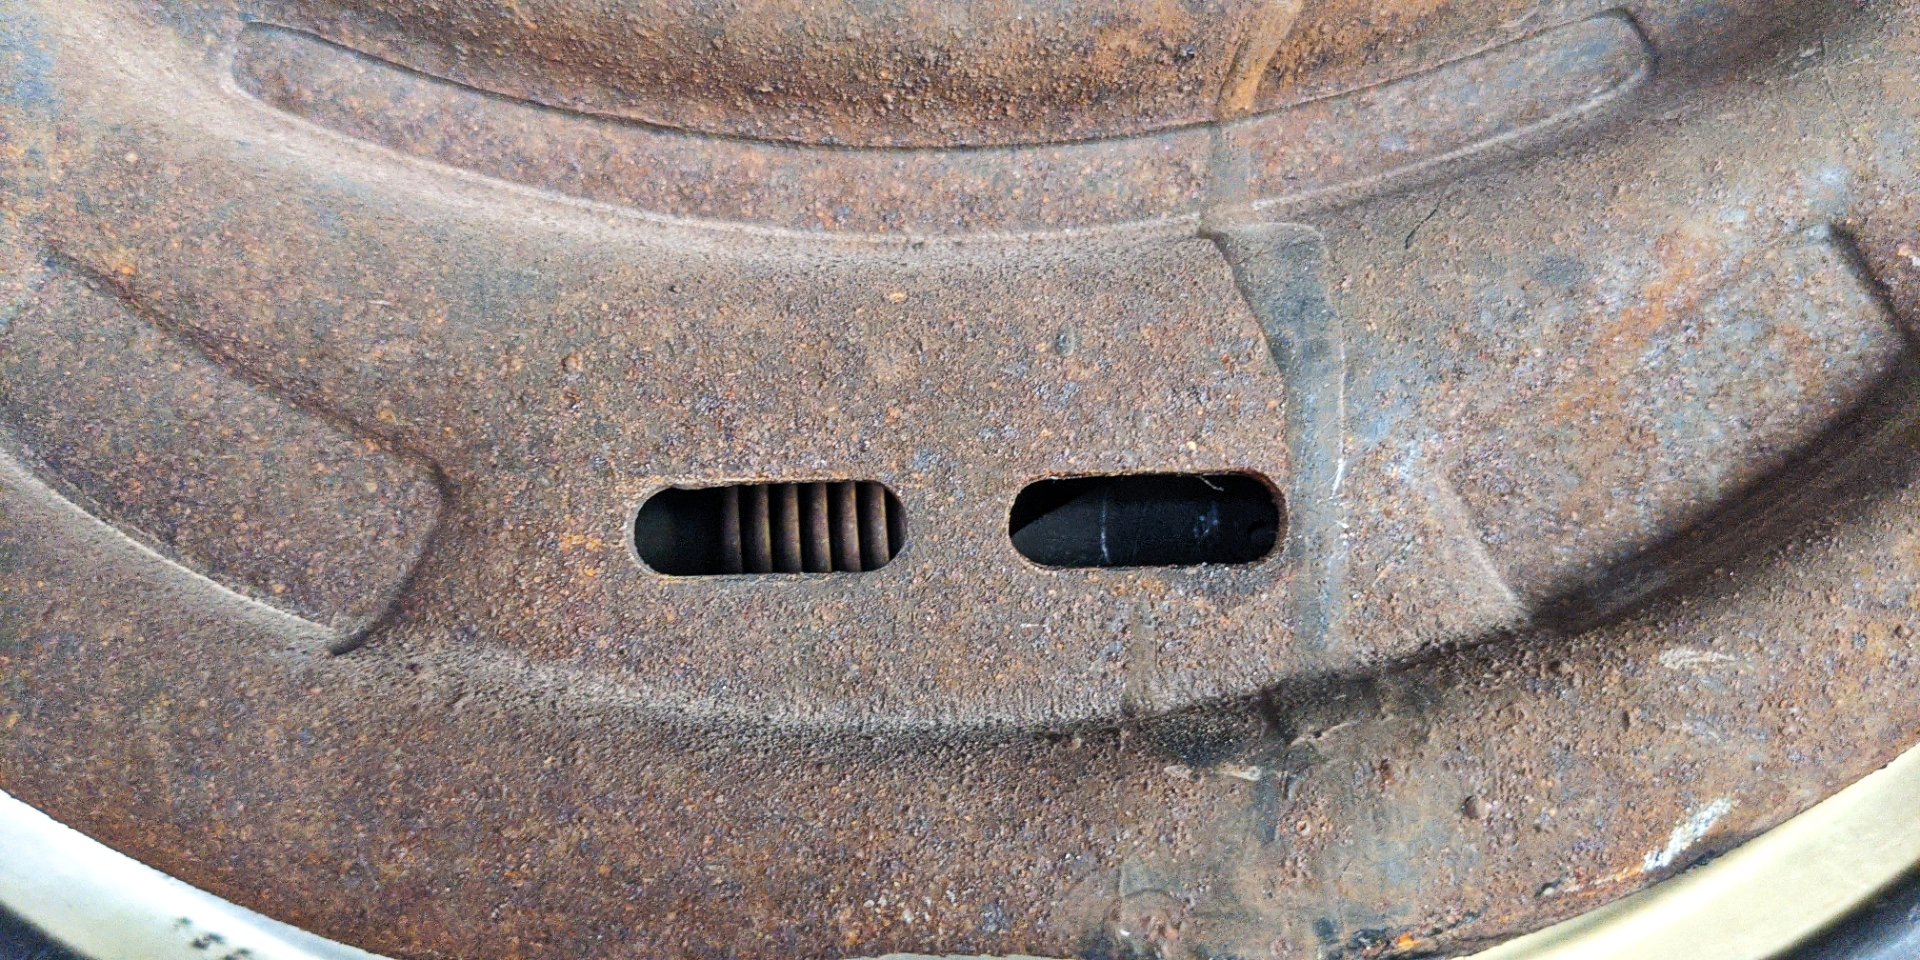
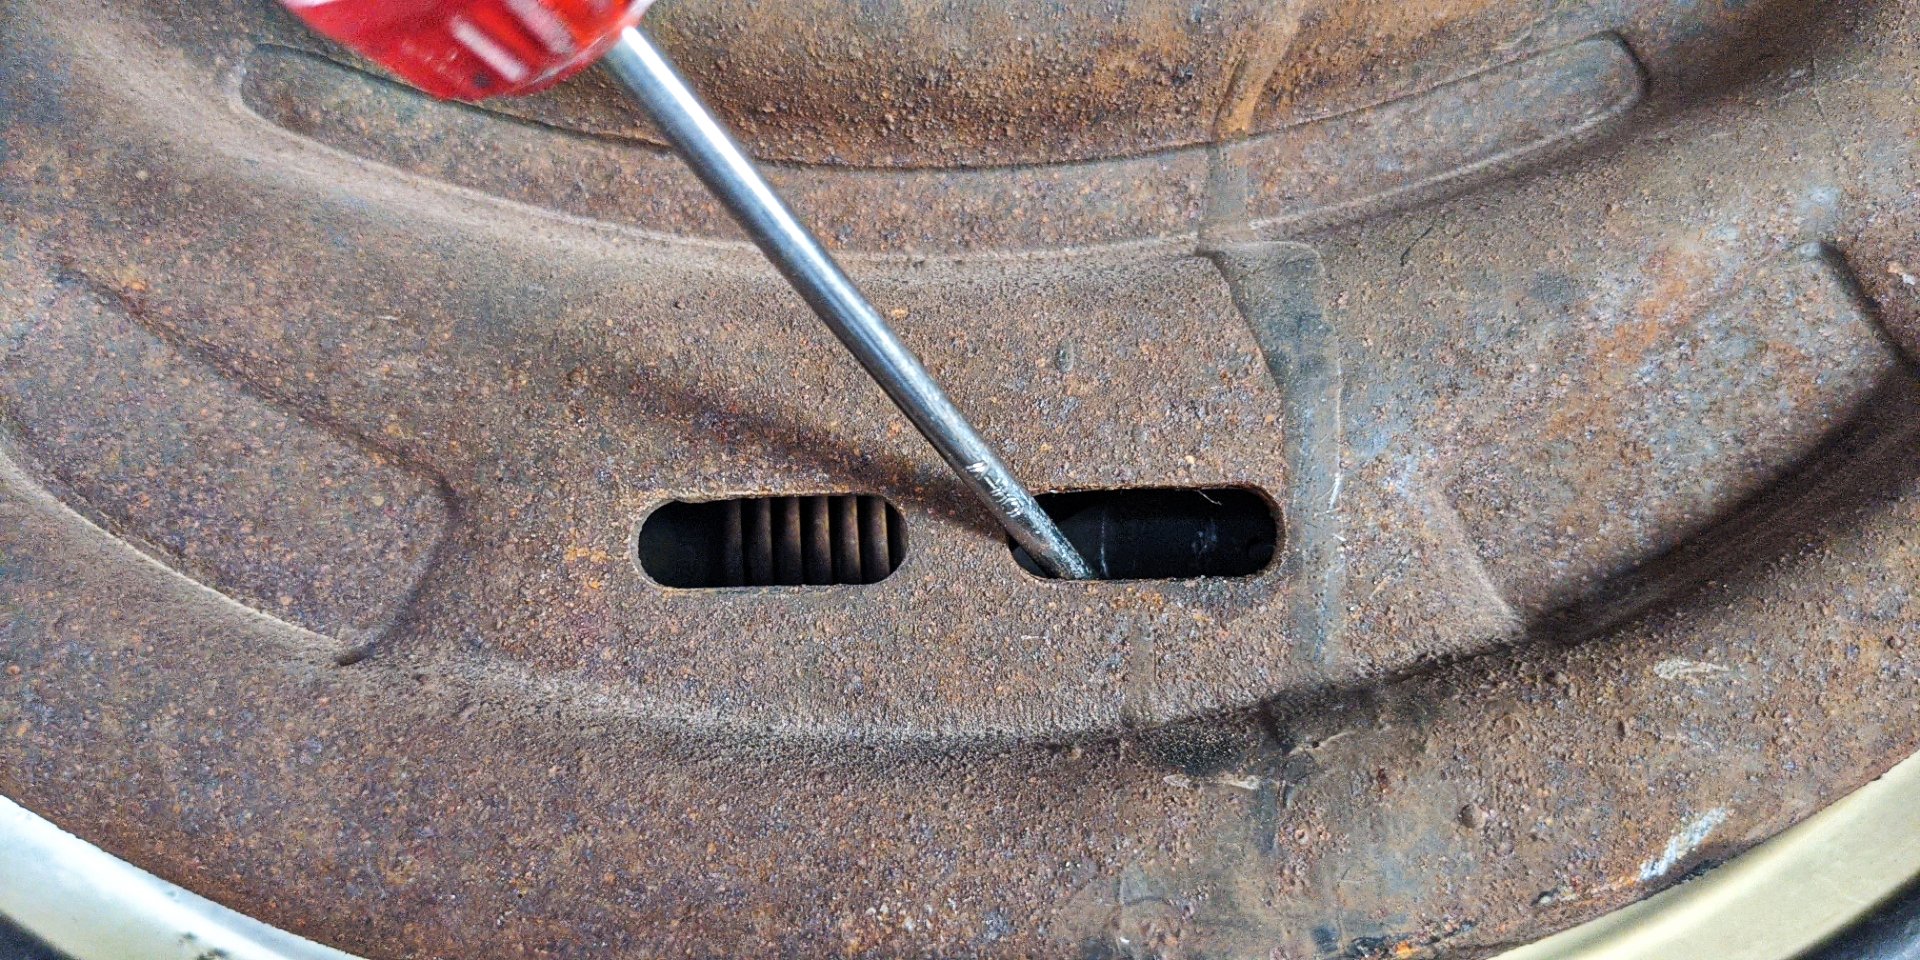

- Adjust If Necessary - If they're in need of adjustment, get underneath and look for a vertical "door" that lifts with a screwdriver. Inside, you'll likely find a notched adjustment knob. Press a screwdriver against a notch to turn, click by click, counterclockwise. This may require a bit of force but will eventually create enough of a touchpoint with the pads for the desired 1 ~ 1.25 turn result.
- Wash, Rinse, Repeat - Nooooow you can lower the jack, torque the lug nuts (our spec is 115 ft-lb) ... and move onto the next wheel!
And That's ... How We Pack Bearings
At eighteen total steps, this might seem like a lot of work. In truth, it is and it isn't. The "is" part comes from prep work: raising the target wheel, removing that wheel while bearing (get it?) its weight, pulling the hub underneath. The "isn't" part stems from the fact that it's all linear and repetitive work. Once you take action and begin the process, it becomes methodical.
Then, right when you feel you're getting the hang of it ... you're done.
Toy haulers, being a significant financial investment, make safety the only additional motivation a guy like me needs to read up on any maintenance matter before ultimately getting on with it. It's one of a few "most" important to-do list items on the rolling fortress task list. I'm lucky to have learned that the easy way, via a war story by another mobile RV repairman (actually a welder) who became an RV repairman after his axle detached and was perpendicular to its intended direction. Across an expressway. In the only available lane.
Because construction.
So ... don't lose your bearings! Just keep 'em packed. The next time your traveling castle is in dry dock for a few months (or at your favorite long-term stay), find your way through the above steps. If you get into trouble, hire a professional. They'll likely show you how to do the rest for future reference.

What's Your Bearing?
There are lots of other toy hauler bearing types. What maintenance do yours require and why? Your input is invited. Leave a comment and/or write an article!
Share Link ...

About Robin Dean
Motorcycle advocate, enthusiast and traveler. Founder, The Riding Obsession (2014). MSF RiderCoach credentials: "loosely regarded adult supervisor, probably good enough for rock 'n' roll" ~ Tidal Playlist | Rabid Neon

Thoughts gone wild? Write an article!